What is Yo Teams
Yo Teams is a fantastic tool that generates Teams apps using Yeoman. By populating a few parameters you are able to generate a basic structure (scaffolding) of a Teams app. The benefit of this is all basic dependencies such as UI, frameworks and Teams SDK are already in place, allowing you to just start building out your app.

I have tried to write this post in a way that caters for all and that anyone (not familiar with web app development) can read.
Pre-requisites
First things first, you need to prep your machine.
ngrok
ngrok is a tool that allows you to post (serve) services running on your local machine to the internet without having to forward any ports on your firewall. For our use case, a web service can be running on your machine and be accessible from the internet by browsing to an ngrok URL. This is very useful for testing during development. Once in production you would want to host your app on a dedicated hosting platform.
The reason you need to use something like ngrok during testing is that even though the web service and Teams may be running on the same machine, Teams needs to be able to access the service from the internet.
Node.js
Node.js is a JavaScript environment that allows your machine to run and execute JavaScript code. In addition, it comes with npm (Node Package Manager) that allows you to install all the dependencies required to create an app.
Go to the Node.js download page and download the latest v10 of Node.js
Whilst newer builds of Node.js may work, currently only v10 is supported.
NPM packages
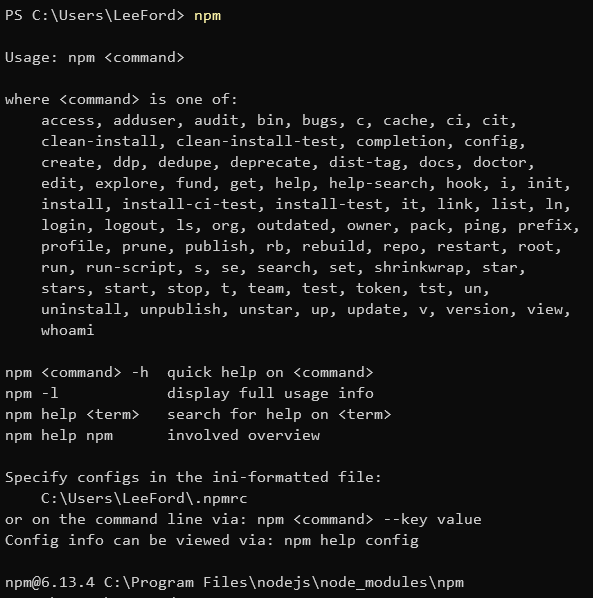
Once node.js has been installed, open a command prompt and run ’npm’ - it should return a version number:
With Node.js and npm installed you can now install the dependencies. Run the following:
npm install yo gulp-cli typescript --global
This should install yeoman, gulp-cli, typescript globally. With those dependencies installed you can now install the app generator itself. This is done by running:
npm install generator-teams --global
Using ‘yo teams’
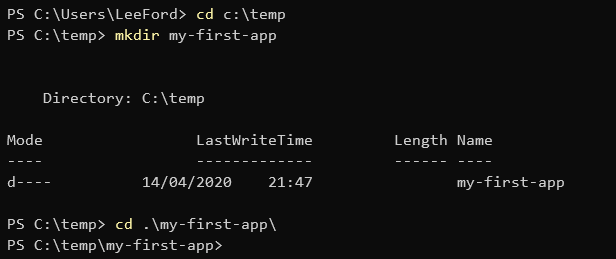
From the command line create a directory to store your app in. Ideally it should be short but descriptive e.g. my-first-app. Navigate to that directory after creating it.
You should now be able to run ‘yo teams’. It will begin asking you questions about your app. Whilst you can customise how you like, for this example try to follow along:
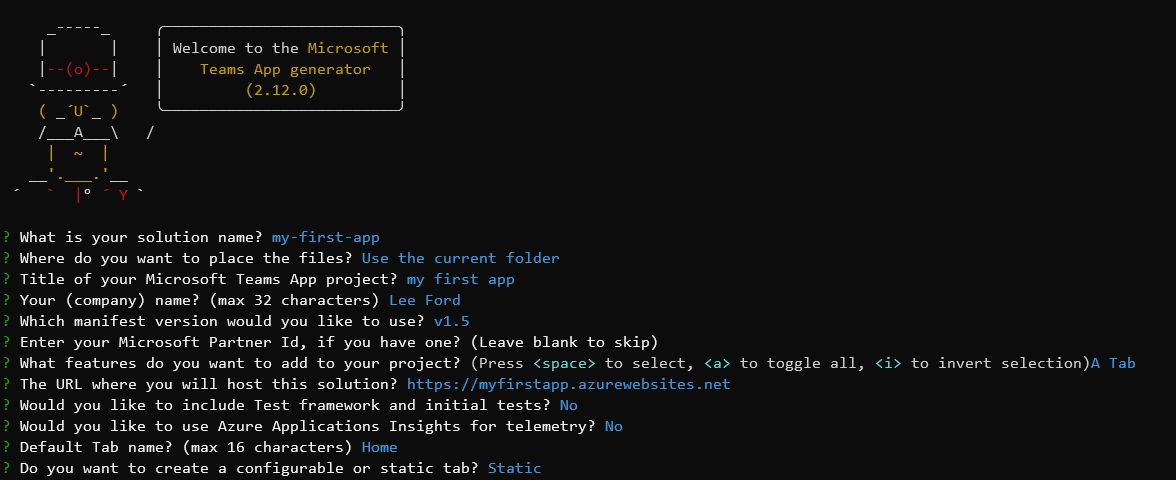
For URL where the solution will be hosted just press enter with whatever Azure website it suggests. This will not be used.
A look inside the generated app
Whilst the intent of this article isn’t to go over each individual file of the generated app, I’ll highlight a couple of areas:
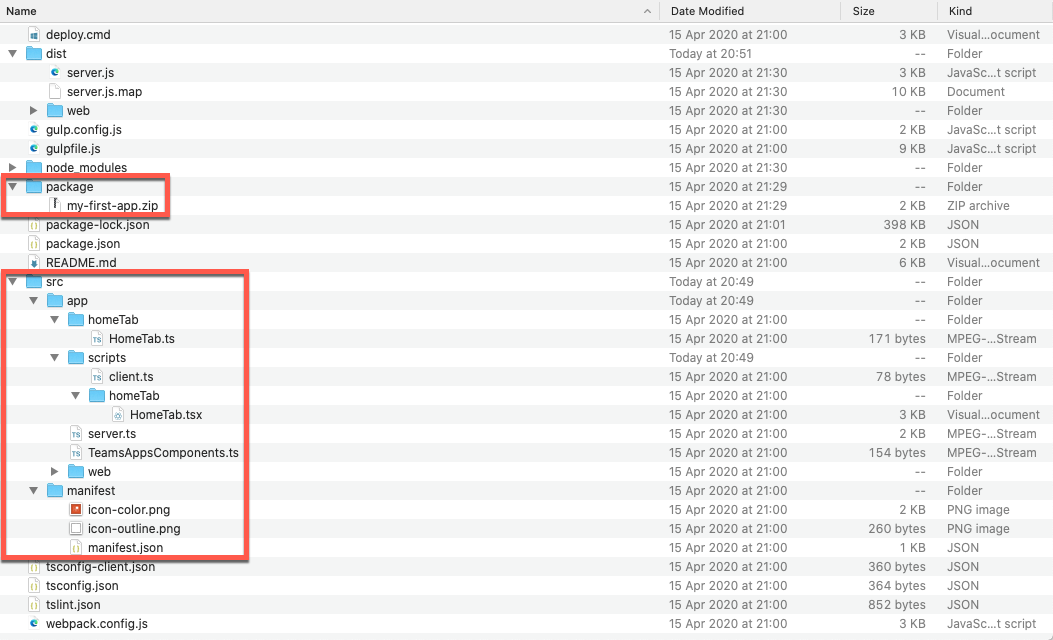
- package folder - this is where the generated app package is stored. This is effectively the ‘app’ that needs to be uploaded to Teams
- src folder - (source) folder where you will actually build the app from
- manifest folder contains the app manifest and images that will be packaged up
- HomeTab.tsx is the file that will be loaded by the Teams client upon using the app
Add some content
Before using this test application, you will need to put some content in the app.
Under src>app>scripts>homeTab, open HomeTab.tsx in an editor - I would strongly recommend VSCode. If you decided to name your tab something different to mine (Home), look for your tab name instead.
A .tsx file is a TypeScript file with react components inside.
Within the .tsx file, there are various components, but for the purpose of this post you need to look at the render() method:
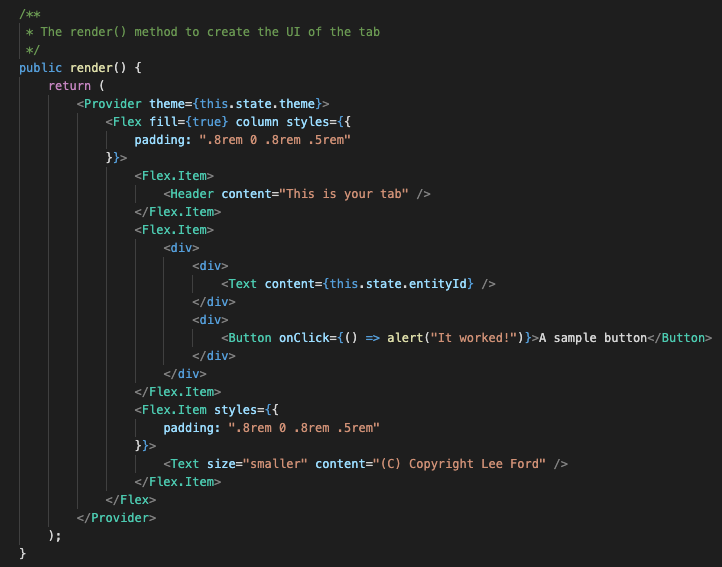
Inside return() is what will be rendered to the Teams client. Whilst this may look like a mix of HTML and React components it is Microsoft’s Fluent UI React library (previously called Stardust).
The Fluent UI React library is a collection of components that will give your apps a native Teams look-and-feel. You will need to read up on the documentation on how to use the UI components at the Fluent UI docs
For now, I am going to modify the header and add a description:
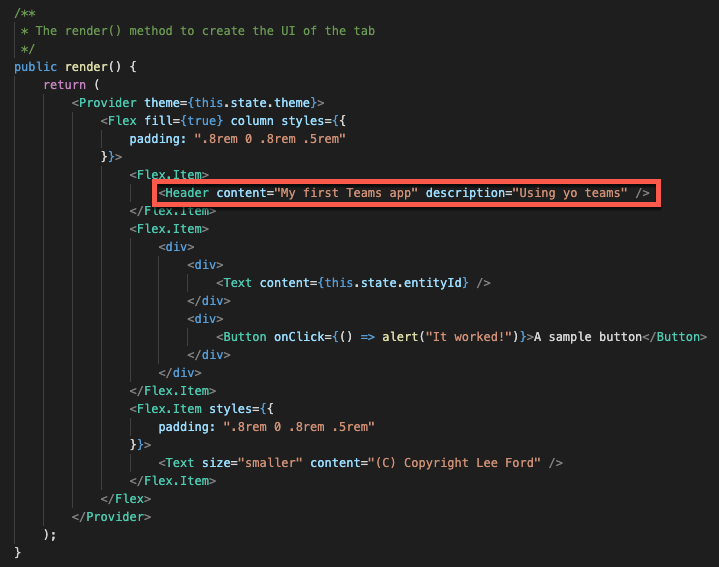
Remember to save the file and it is time to package the app and serve it.
Serving the app (using ngrok)
Effectively, by serving the app you are hosting it on a webserver. For Teams apps, this needs to be accessible from the internet. During development and learning you can use ngrok (you should have this installed now) to serve the app to the internet from your machine.
Using gulp, yo teams has handily built in a command to run your app and post it to the internet using ngrok. Simply run the following (from the root of the app folder):
gulp ngrok-serve
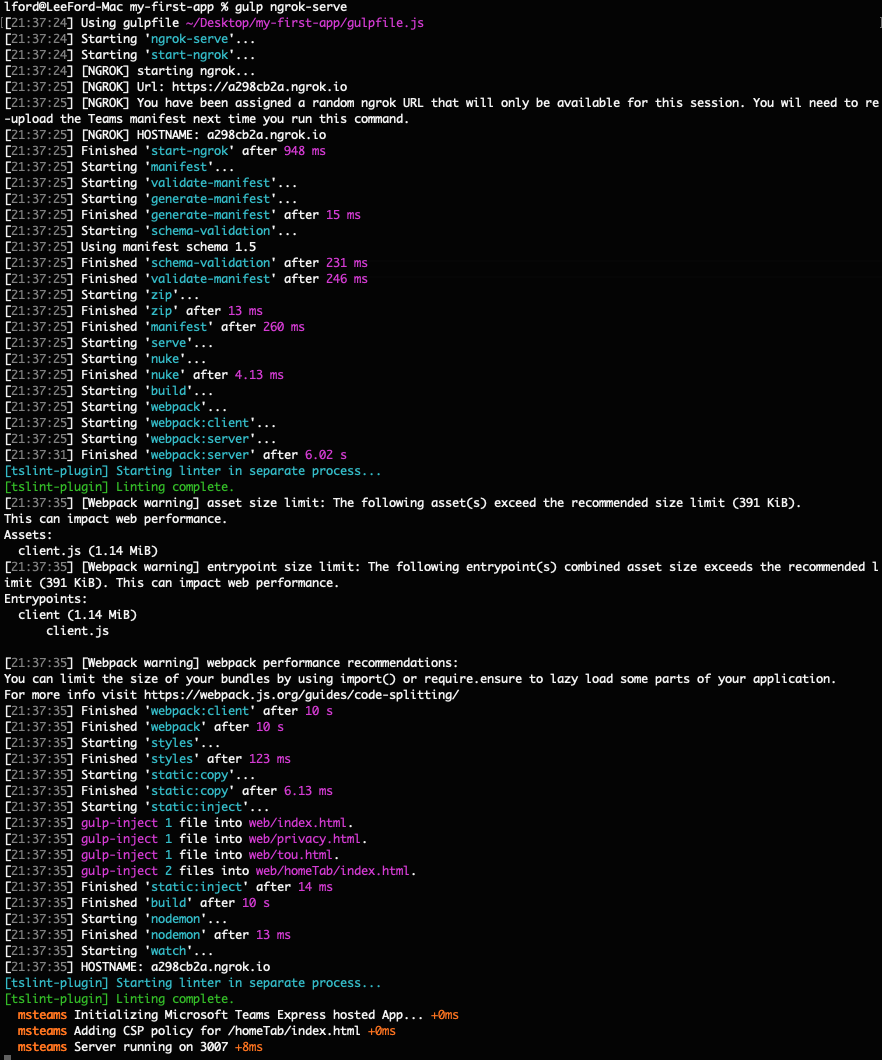
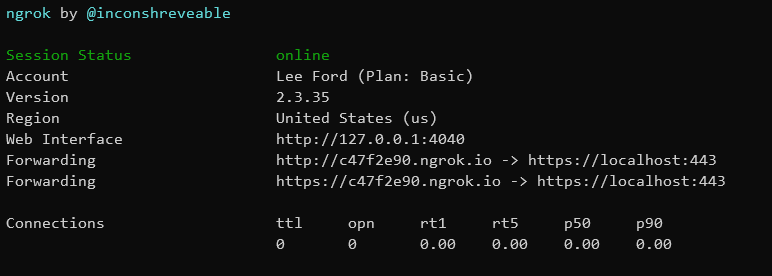
If you look at the output you can see an ngrok.io URL being used to host your app. It will also tell you that this URL is temporary, so when the URL changes you need to use the new app package in Teams.
In production this would be built with a URL that would not change.
Hopefully, you should have “Server running on…” at the end of the output.
Uploading the app package to Teams
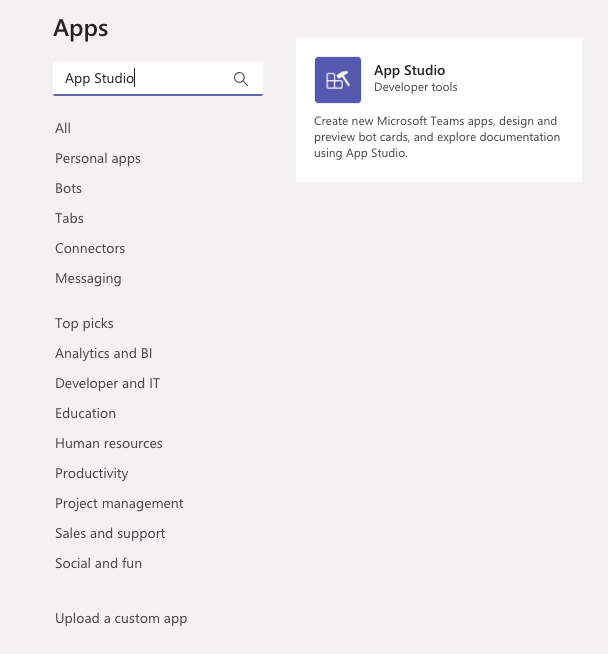
With the previous command still running, the next step is to upload the app package in to Teams. This is achieved using App Studio in Teams. This can be found in the Teams “App Store”:
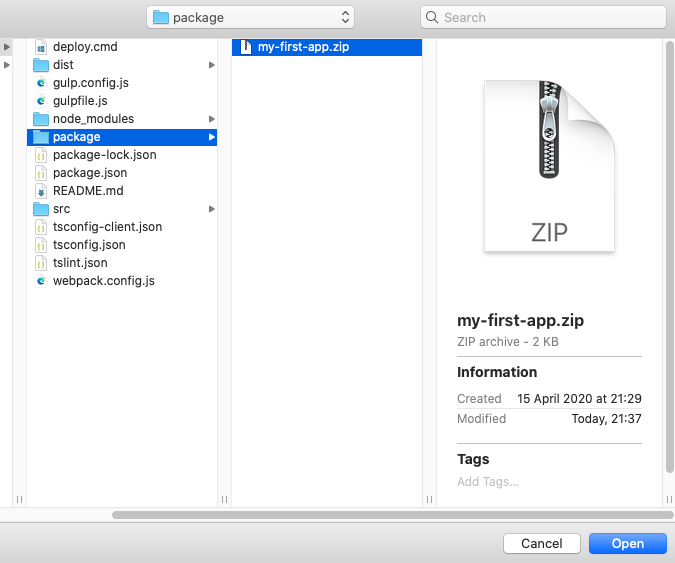
Within App Studio, goto to Manifest Editor and select Import an existing app and locate the .zip file in the package folder:
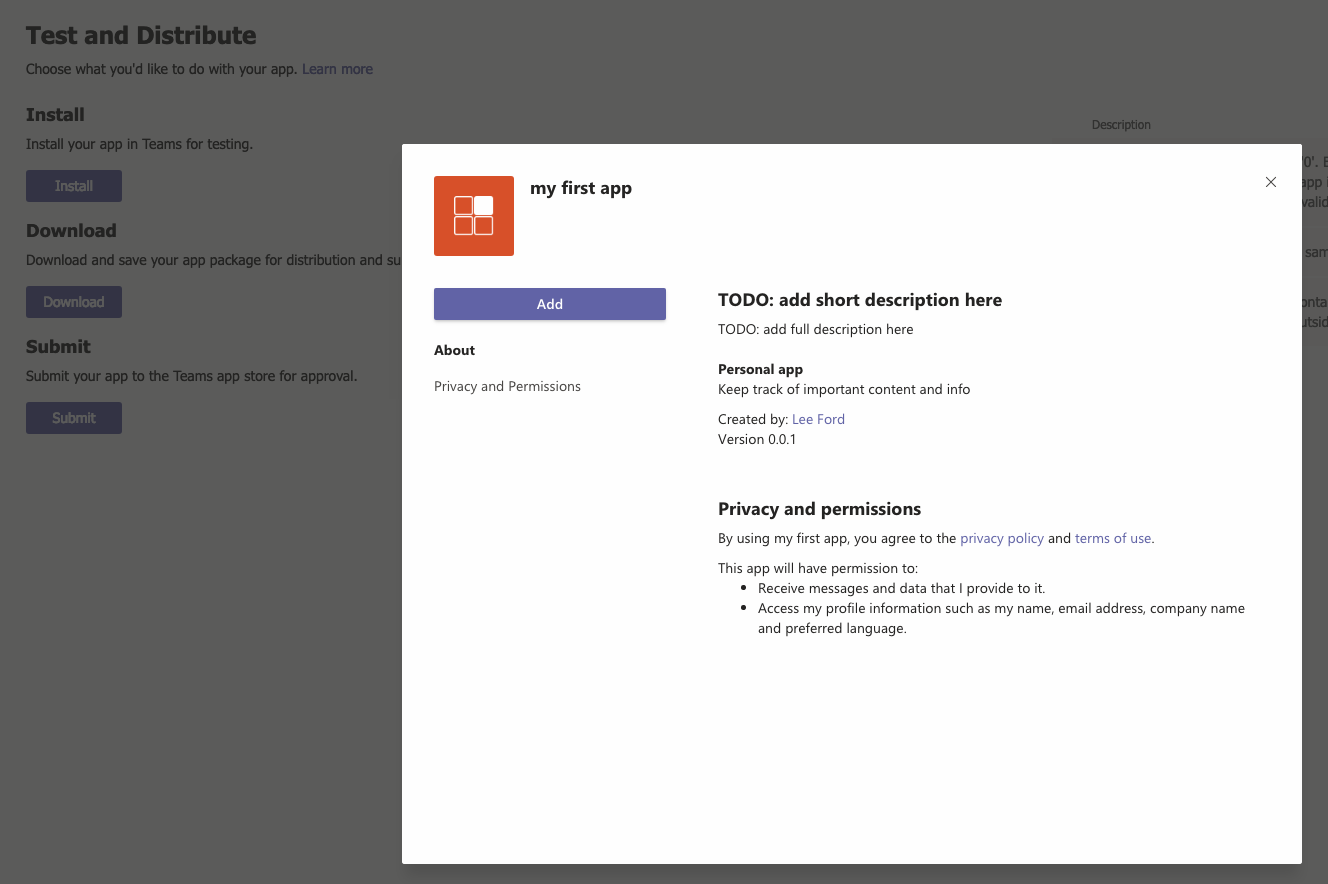
It should now appear in App Studio. Edit it and go to Test and distribute and click Install followed by Add:
Although it may seem tempting to modify properties of the app here in App Studio, this will only modify the imported package, not your app on your machine. The next time you upload a package, any changes will be lost.
Using the app in Teams
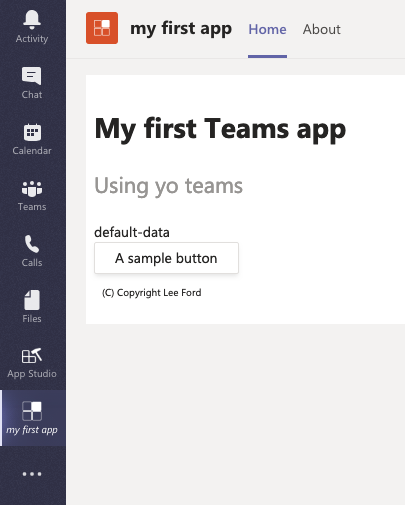
With the app package installed in Teams and the app being served via ngrok, you should now see the app appear on you toolbar. Hooray!
Next steps
Whilst this is just a primer, you have now managed to create a basic Teams app. The next steps are to work on the app itself using Fluent UI, React, TypeScript etc. Check back here often for more content to help you on your way.