This blog post is inspired by Ayca Bas’s excellent blog post on this subject using Azure Logic Apps instead of Power Automate
Introduction
Microsoft To Do is a great tool for allowing you to keep lists of tasks across your personal and work life. This could be something as simple as a shopping list or a project or anything that can be split down into individual tasks.
With the release of the To Do APIs in Microsoft Graph, it is now possible to integrate with your To Do tasks outside of To Do.
A Helpful Reminder
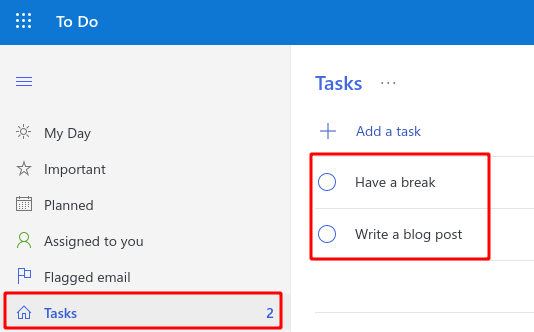
Whilst you can set reminders against tasks in To Do, wouldn’t it be awesome to have these surface outside of the To Do app too? Before we start, make sure you have some pending tasks on your Tasks list in To Do!
In this article, we will go over how we can have Power Automate send your outstanding tasks daily into Microsoft Teams. To achieve this, we will undertake the following:
- Learn how to interact with the Microsoft Graph To Do APIs in Microsoft Graph Explorer
- Register an Azure Active Directory app
- Create a Power Automate Custom Connector to interface with the Microsoft Graph To Do APIs
- Create a Power Automate Flow to automate sending tasks to Microsoft Teams using the Microsoft Teams Flow Bot
Microsoft Graph To Do APIs in Graph Explorer
To understand how the Microsoft Graph To Do API queries work, let’s use Microsoft Graph Explorer to make a query against your own data. Microsoft Graph Explorer is a great web-based tool for using Microsoft Graph without having to create anything yourself. If you want to test something will work (before you create your app) or try out a new command, this is the quickest and easiest way to do so.
The first task is to select Sign in to Graph Explorer.
Once signed in, under the Getting Started section of Sample queries run the my To Do task lists query. This should run the query of https://graph.microsoft.com/v1.0/me/todo/lists and return your task lists.
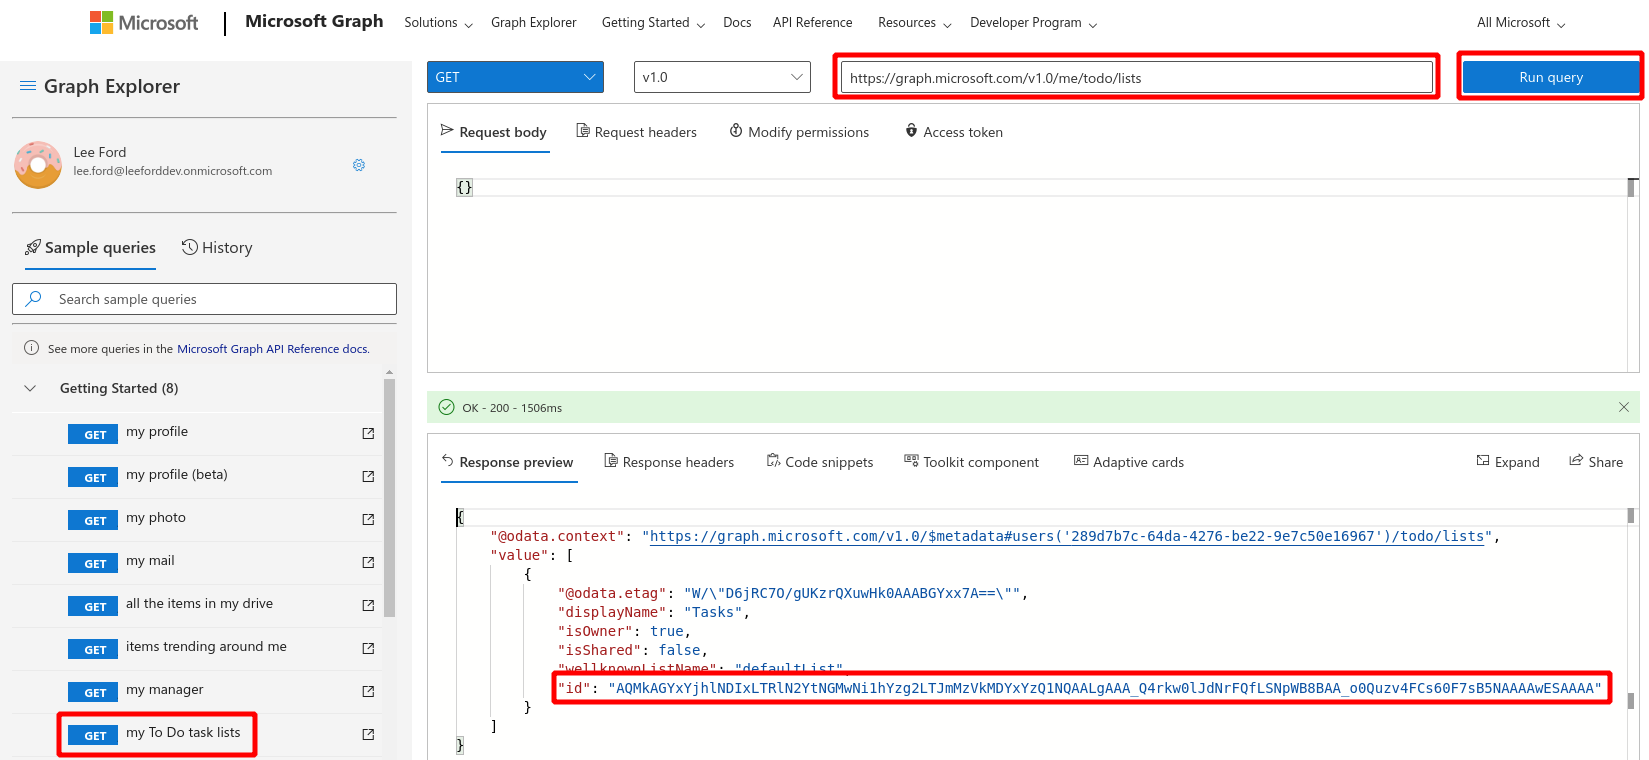
You will notice inside the response there is a task list with an id. Using the id, change the address of the query to https://graph.microsoft.com/v1.0/me/todo/lists/{taskListId}/tasks, with {taskListId} being replaced with the id in the response.
If the task lists response contains multiple task lists, don’t worry, just choose the list with the name
Tasks
Based on my response above, my query would be https://graph.microsoft.com/v1.0/me/todo/lists/AQMkAGYxYjhlNDIxLTRlN2YtNGMwNi1hYzg2LTJmMzVkMDYxYzQ1NQAALgAAA_Q4rkw0lJdNrFQfLSNpWB8BAA_o0Quzv4FCs60F7sB5NAAAAwESAAAA/tasks
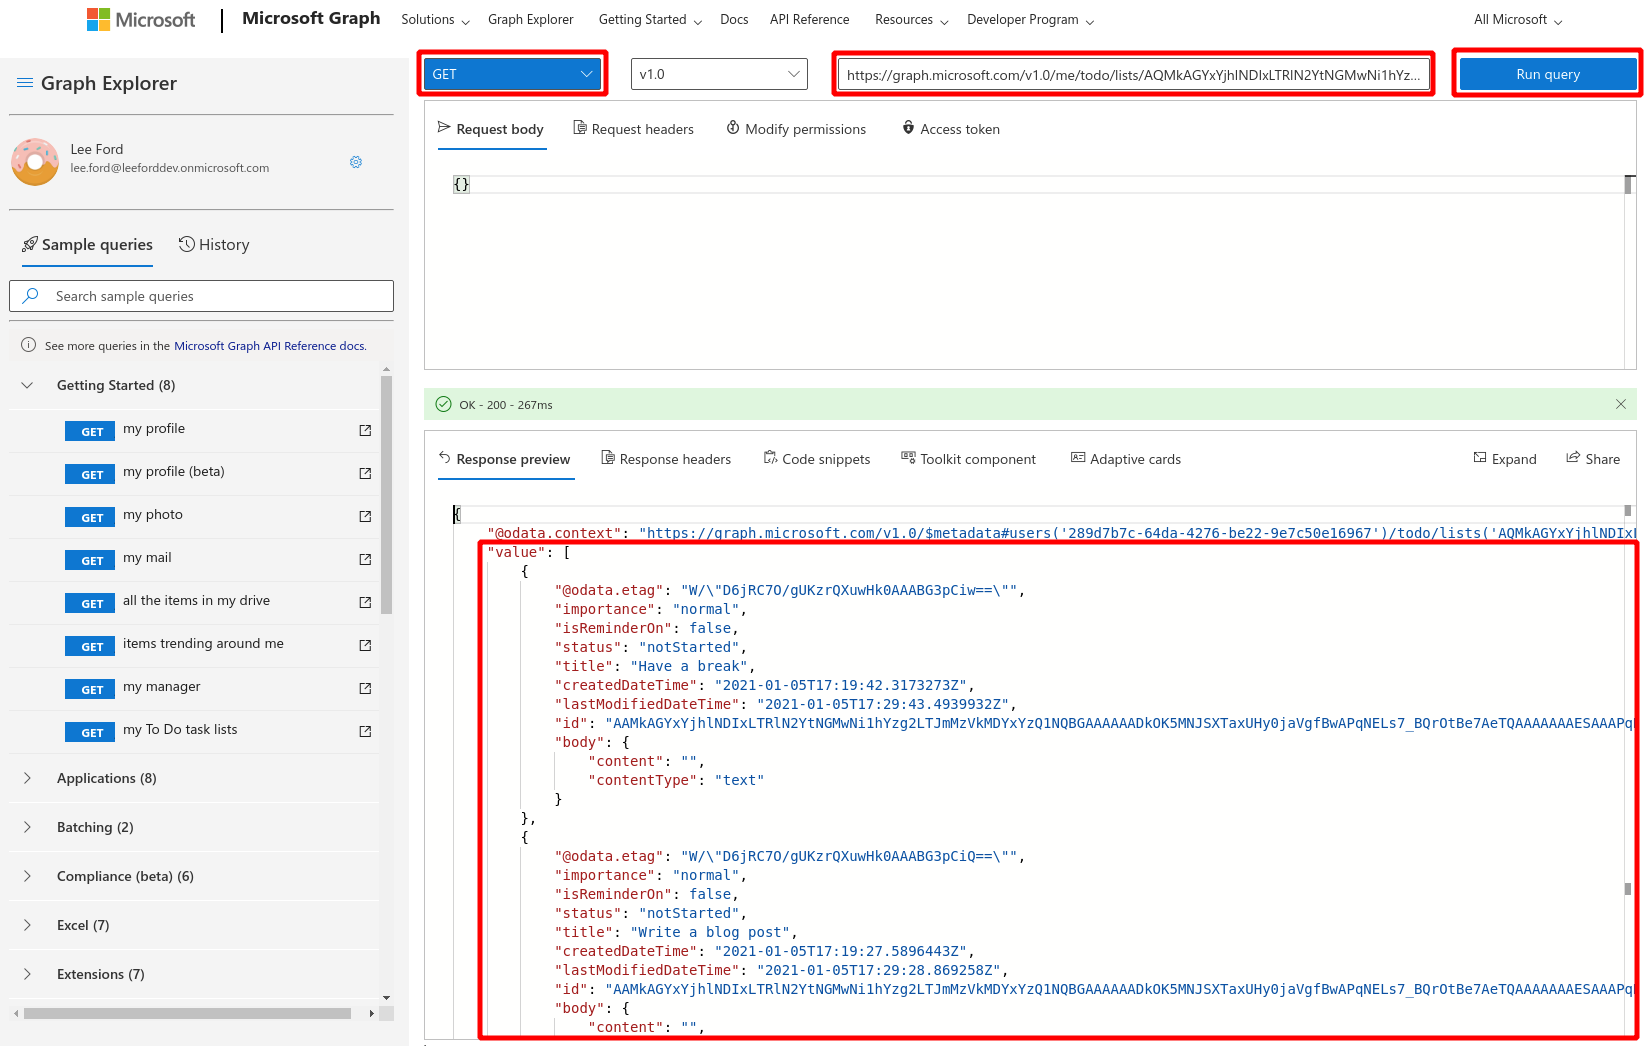
Ensure you set the request type to
GETand the version tov1.0
Take a copy of your request address as we will need that later on.
Register an app in Azure Active Directory
To be able to read your To Do task data using Microsoft Graph, we will need to grant an Azure AD application permission to access it.
This app registration can be used for more than one user, should you wish for multiple users to use this solution, the same registration can be used for each Power Automate Flow
Registration
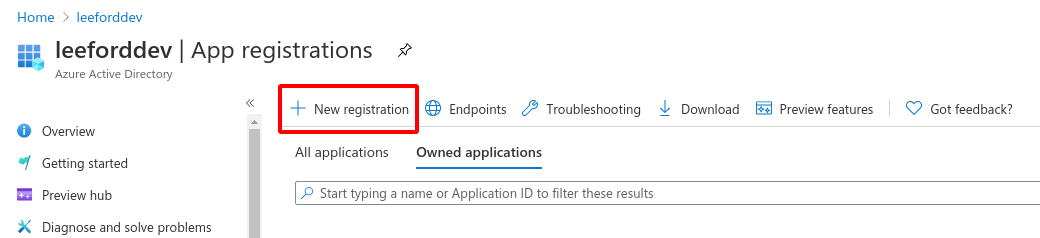
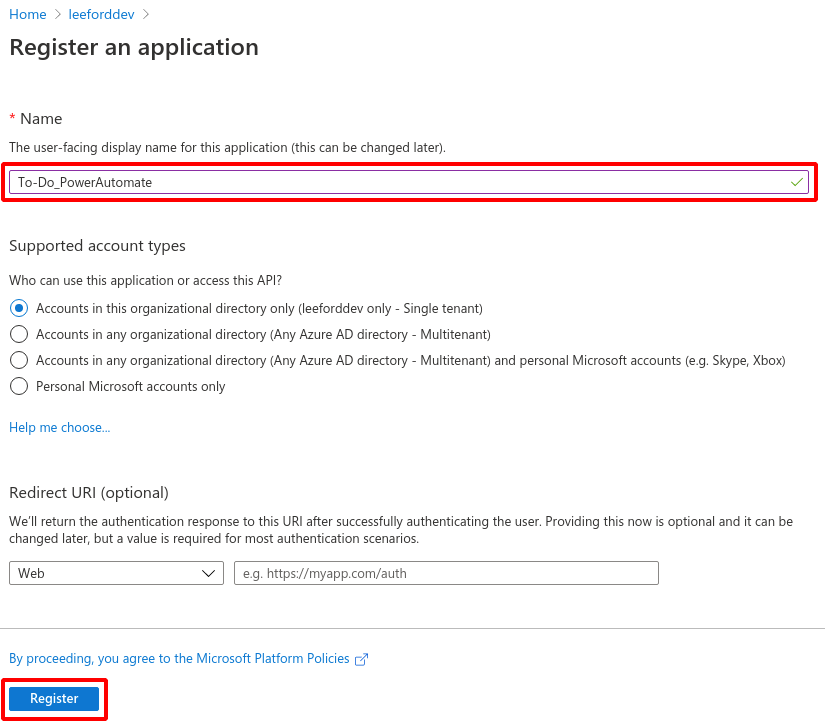
First, go to Azure Active Directory in the Azure Portal. Under App registrations select New registration from the top menu.
Give the app an arbitrary Name e.g. To Do_PowerAutomate, leave Supported account types and Redirect URI with the default values. Select Register to create the app.
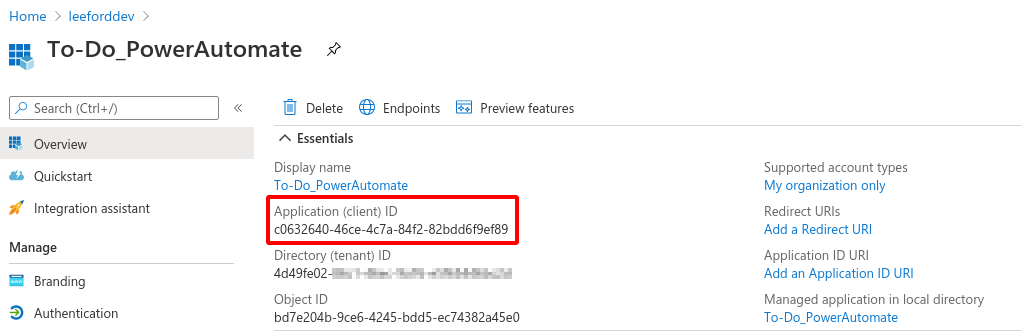
With the app created, take note of the Application (client) ID as this will be needed later.
Create a secret
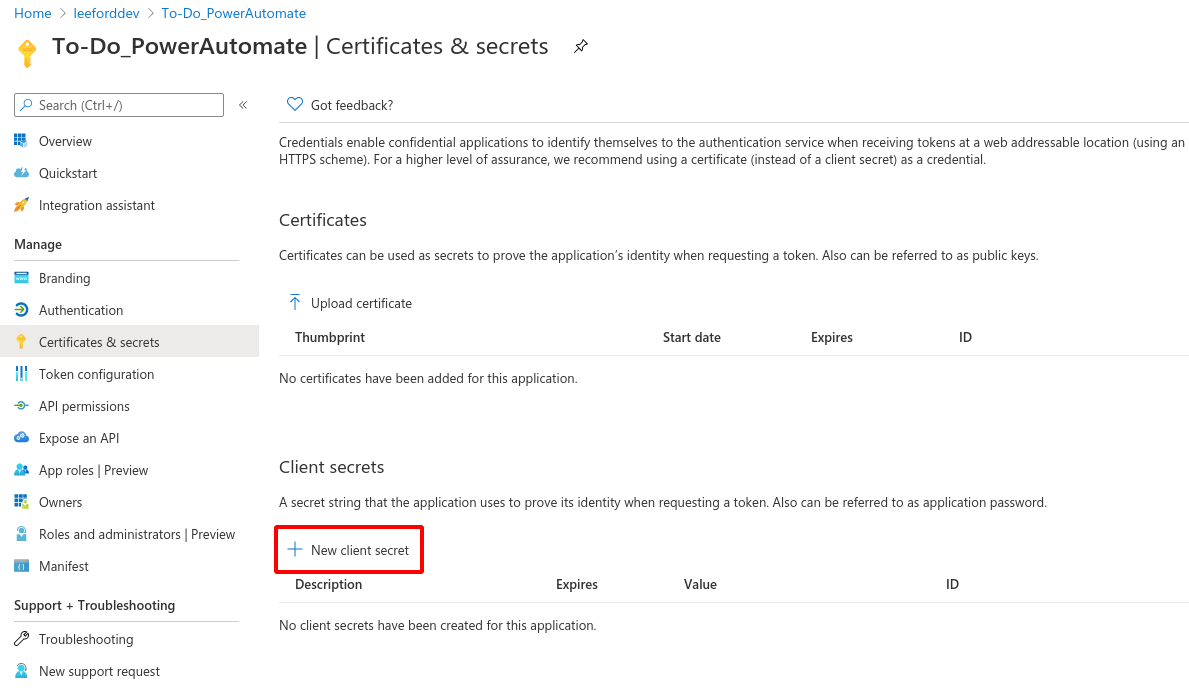
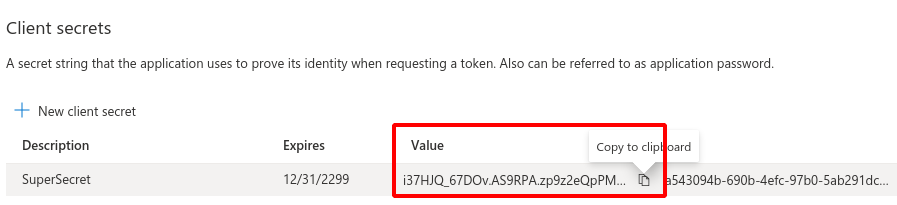
Next, we need to create a secret under Certificates and secrets on the left-hand menu. To create a secret, select New client secret and give the secret a Description and when it Expires.
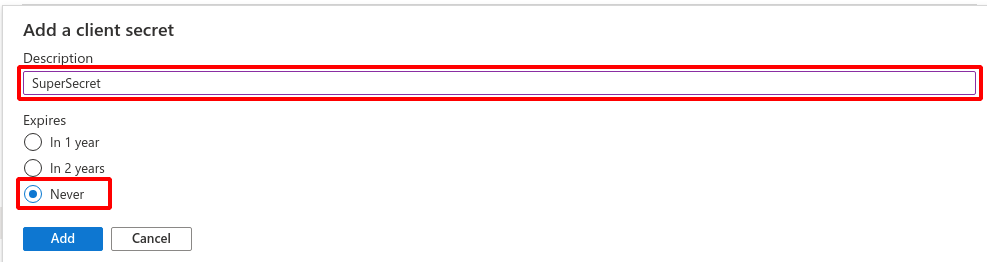
Before the next step, take a copy of the Value of the secret and store it securely somewhere. This has to be copied now as once we move away the secret value will be hidden.
Assign Microsoft Graph permissions
Finally, we need to assign Microsoft Graph To Do permissions to our app. This allows our app to query To Do APIs in Microsoft Graph as we did in Microsoft Graph Explorer earlier.
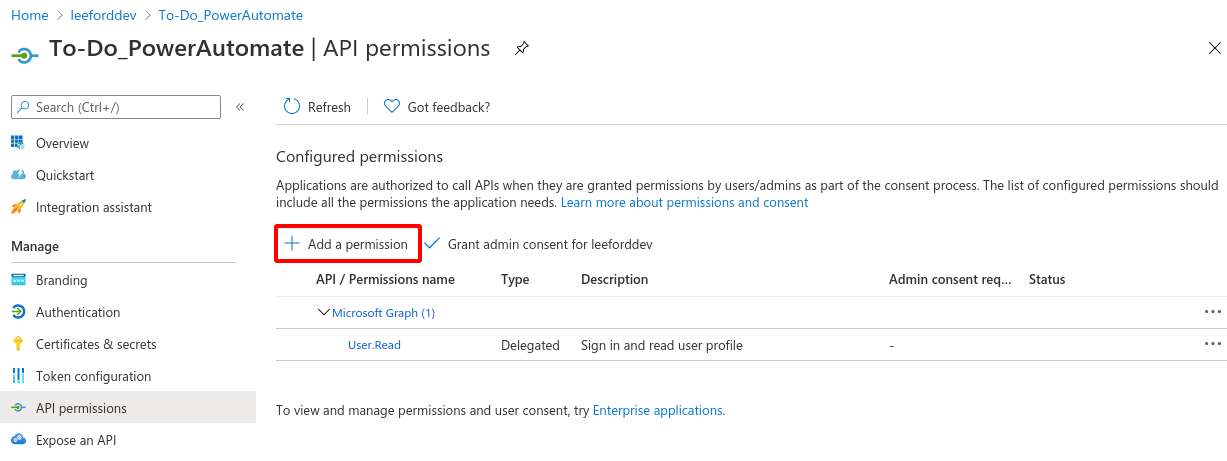
Under API permissions on the left-hand menu, select Add a permission.
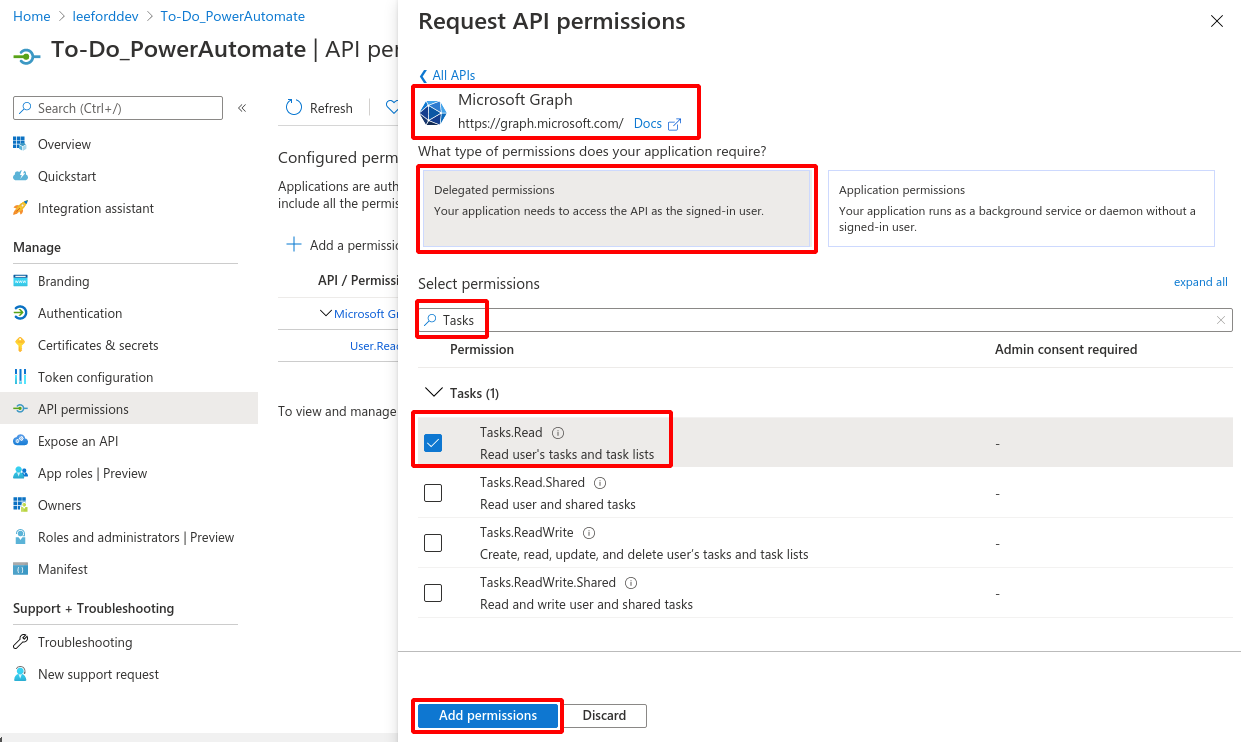
Select Microsoft Graph as the Microsoft API and Delegated permissions. Search for Tasks and choose the Tasks.Read permission and select Add permissions.
Tasks.Read is one of many different API permissions in Graph. Helpfully, there is a full breakdown of the different Microsoft Graph permissions
You should now see Tasks.Read under Configured permissions.

That is all we need to do here for now, but there is one final step to be done, later on, so leave the page open in your browser.
Create Power Automate Custom Connector
Moving over to Power Automate, we need to create a Custom Connector. A Custom Connector is a way of interfacing with APIs in specific ways, in our case - talking to Microsoft Graph and obtaining our list of tasks.
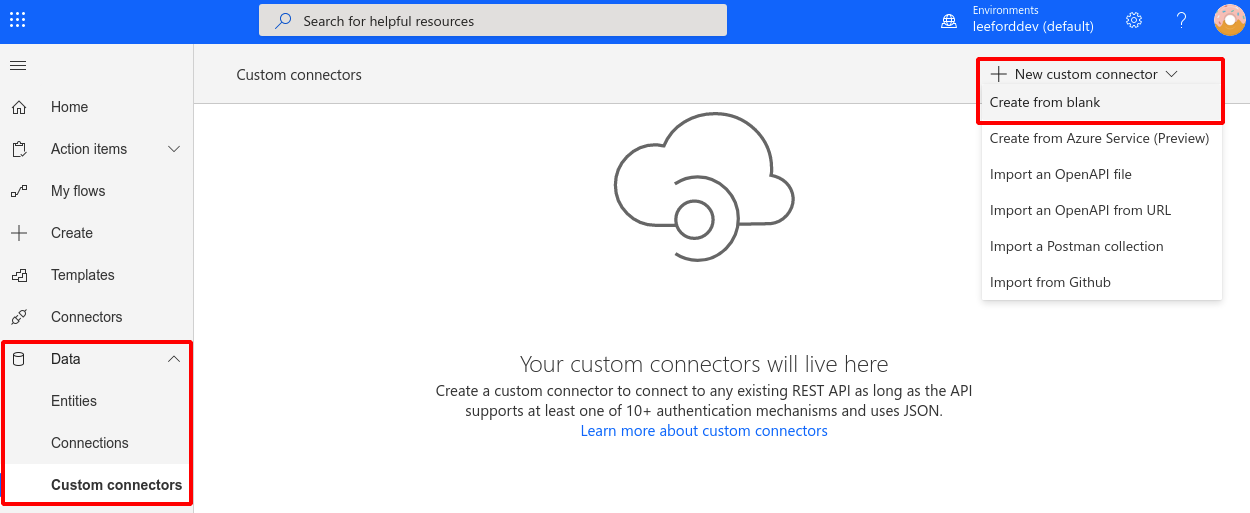
To create a Custom Connector, go to Data > Custom connectors on the left-hand menu in Power Automate. Here, select New custom connector and Create from blank
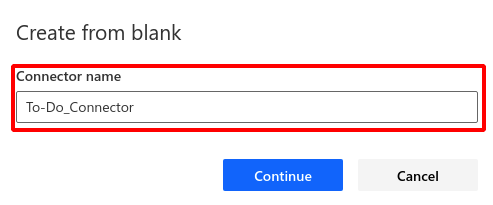
Give your connector an arbitrary Connector name e.g. To Do_Connector and choose Continue
For the first step, we need to specify the Host as graph.microsoft.com and select Security to move on to the next step.

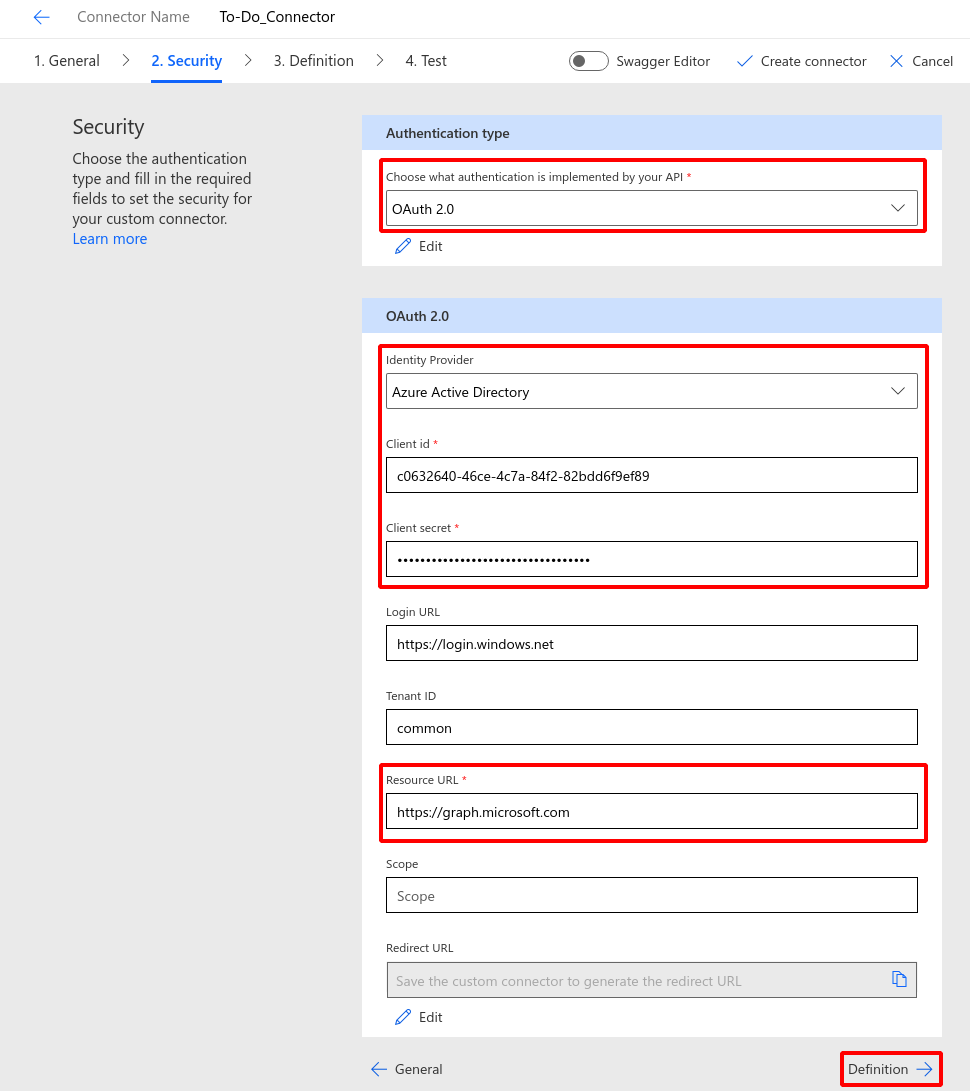
For security, set as follows:
- Authentication type:
OAuth 2.0 - Identity Provider:
Azure Active Directory - Client id: Application (client) ID we noted down when creating the Azure AD app
- Client secret: Client secret we noted down when creating the Azure AD app
- Resource URL:
https://graph.microsoft.comwith no trailing/ - Everything else can be left as it is
Select Definition to move on to the next step.
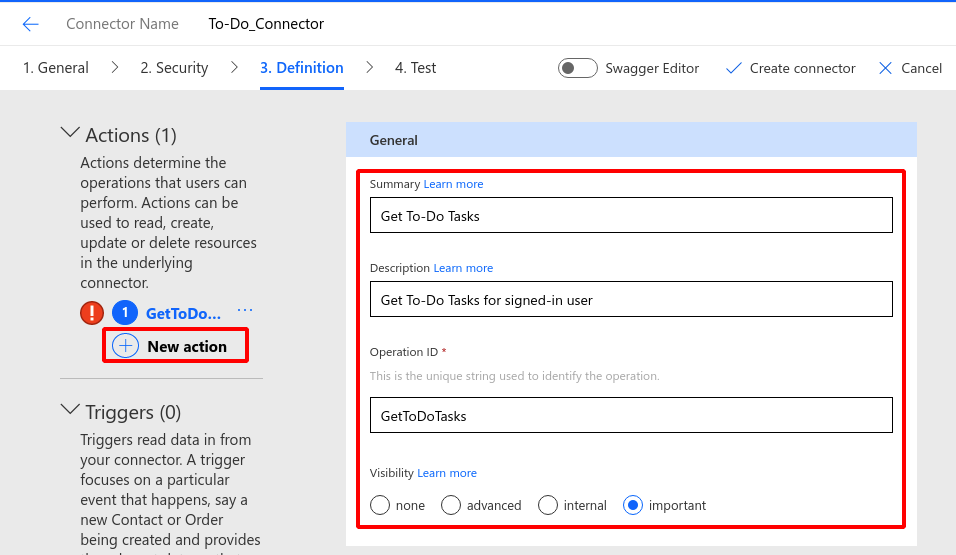
We now need to create an Action. An Action is an operation that our connector will perform when asked. In our case, our connector will retrieve our To Do tasks for us.
Select New action and provide the action with the following:
- Summary: A summary of what the action is doing e.g.
Get To Do tasks - Description: A more in-depth description on what the action is doing e.g.
Get To Do tasks for signed-in user - Operation ID: Unique identifier of the action. Use
GetToDoTasks - Visibility:
Important
Under the Request section, we need to provide it with sample data so the action understands what the data from Microsoft Graph will look like. Choose Import from sample and provide the following:
- Verb:
GET - URL:
https://graph.microsoft.com/v1.0/me/todo/lists/{taskListId}/tasks- you should have a copy of this (with yourtaskListId) from when we used Graph Explorer earlier. - Headers: Leave blank
Select Import

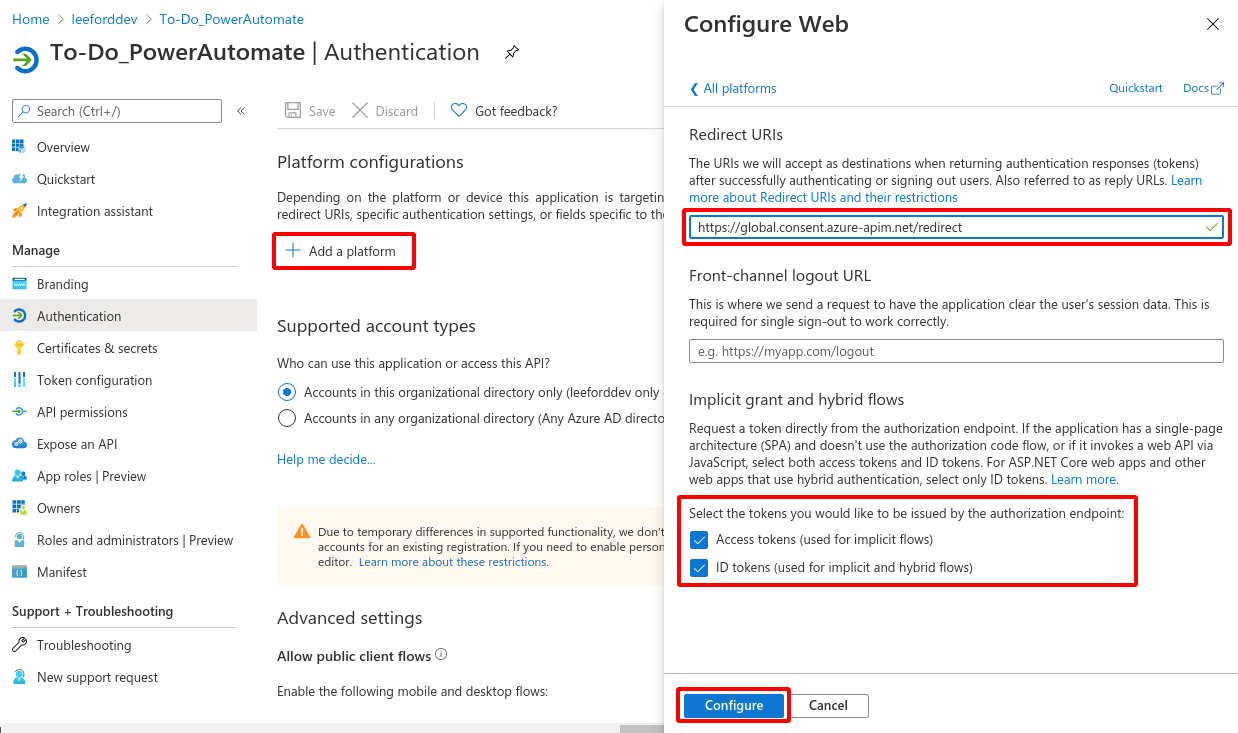
Finally, select Create connector at the top right. Once saved, go to the Security section and copy the Redirect URI
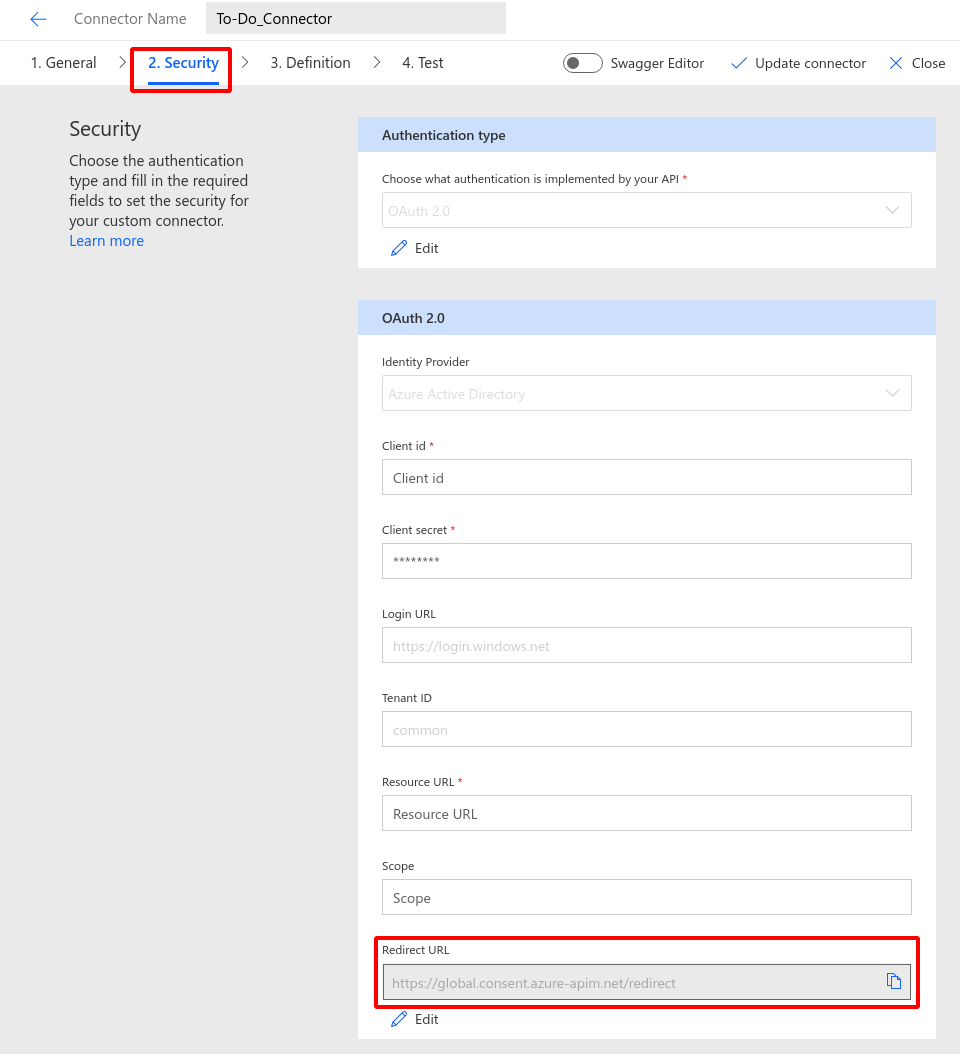
If we now briefly head back to the Azure AD App with the Redirect URI. Under Authentication, select Add a platform and paste the Redirect URI you copied into the Redirect URIs text box. Select Configure to add it.
Create Power Automate Flow
Now we are going to tie everything together with a Power Automate Flow. A Flow is essentially a no/low code way to script something. In our case, we are scripting retrieving our To Do tasks and sending them into Microsoft Teams.
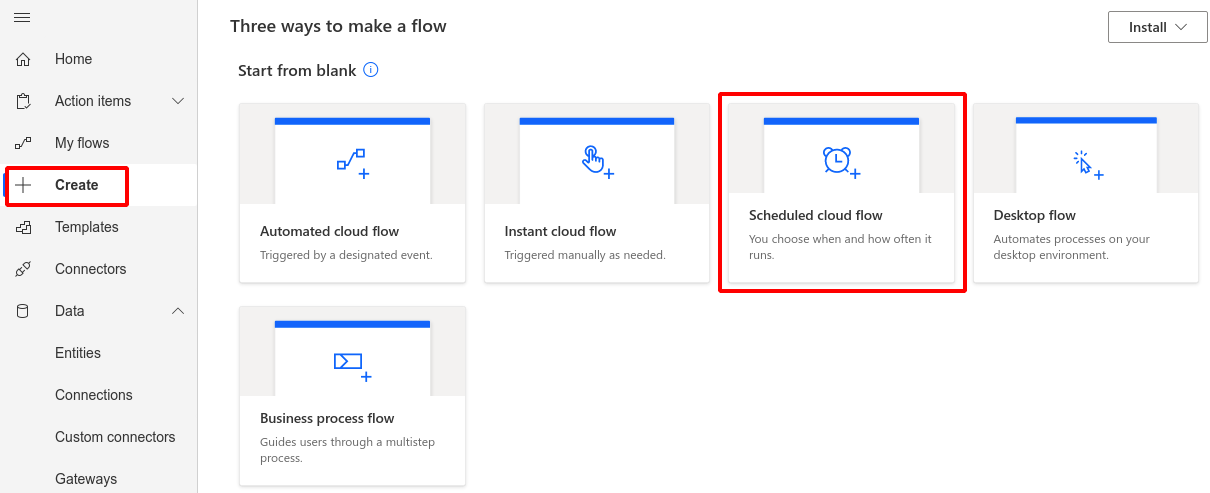
To do this, head back the Power Automate and select Create from the left-hand menu and choose Scheduled cloud flow.
By sheduling this flow trigger type, it can be scheduled to run as frequently as you like.
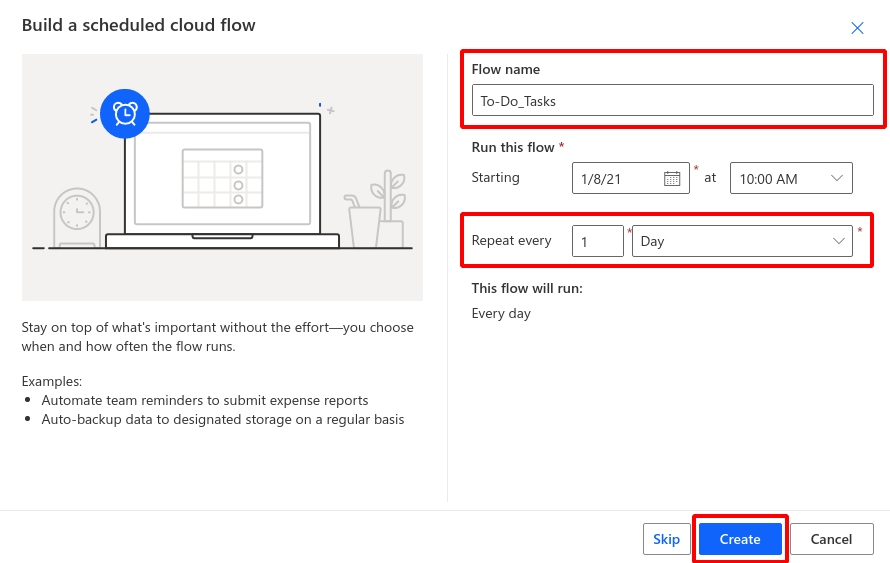
Give your flow a Name and set a Repeat every of 1 Day. Once done, select Create
As this is a Flow, the logic will behave as a flow chart would. Under the Recurrance trigger, we need to add some additional steps to the Flow.
To start, select New step and here we need to find the action we created. The quickest way is to change the type to Custom and then select it under Actions.

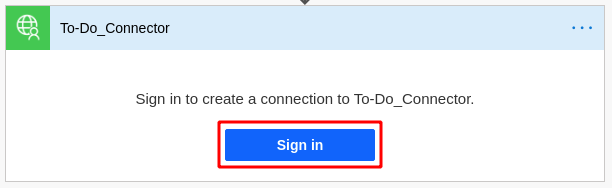
Next, you need to sign in to your account to get your tasks.
As mentioned earlier, this can be used in multiple flows, allowing a whole team to use the connector to get their own tasks
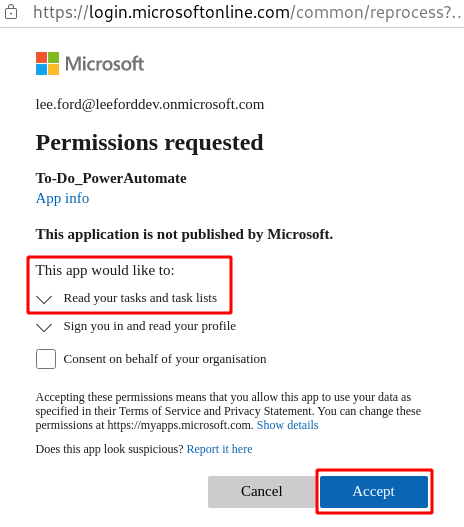
During the sign-in process, you will need to consent the app to read your task lists.
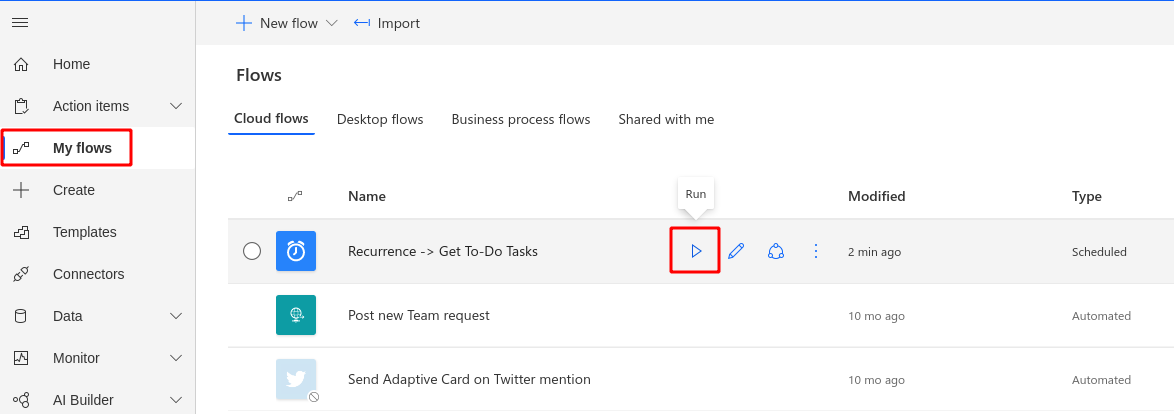
Before we go any further, select Save at the top of the page and then go back to My flows. Hover over the Flow you created and choose Run.
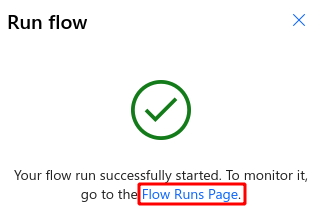
Hopefully, it was successful and you can see the result in the Flow Runs Page.
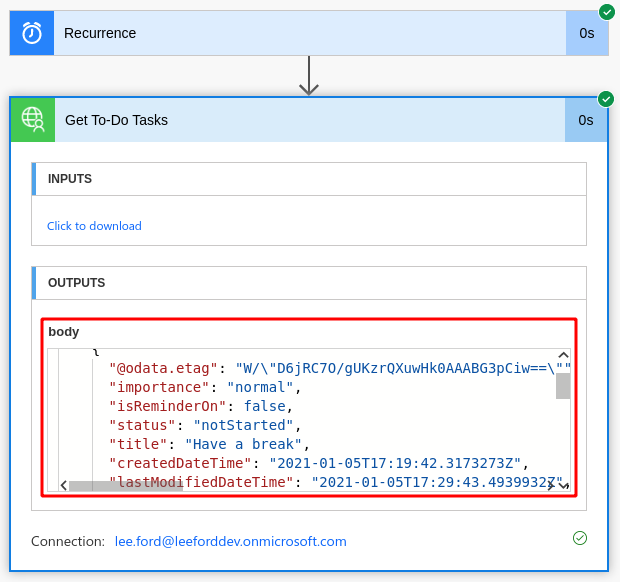
Looking at the body of the Output there is some data (which is the same as what was shown in Graph Explorer earlier). Copy the body output and then select Edit at the top of the page to finish off the last bits of the Flow.
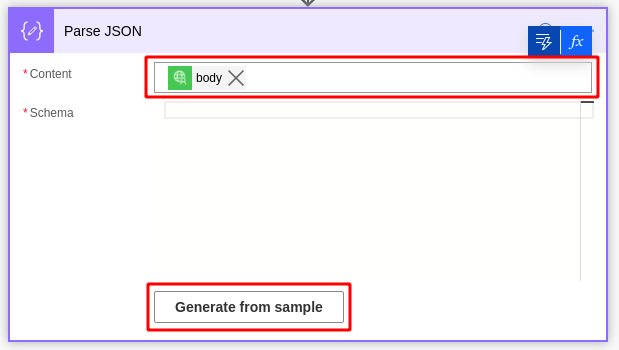
The body output is great in JSON format, but we need to be able to split it down into smaller chunks (tasks). To do this, we need to be able to parse (read) the JSON output. Add a Parse JSON step and set the Content as Body. To create a Schema choose Generate from sample.
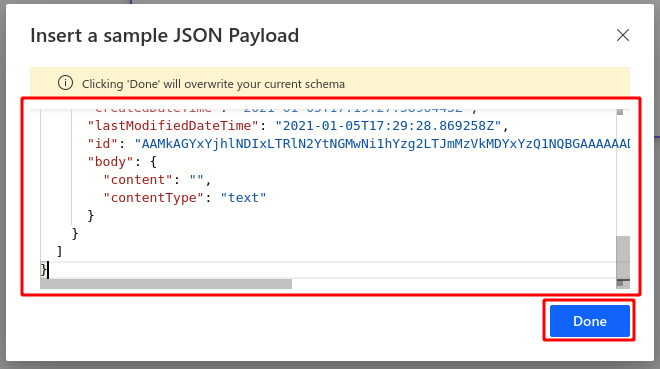
Paste in the body output from earlier and select Done.
The next step we need to add is Initialize variable. We need to create an Array. An array is a collection of values or objects. In our case, ours is a collection of tasks. Give the variable the name of Tasks and set the type to Array.

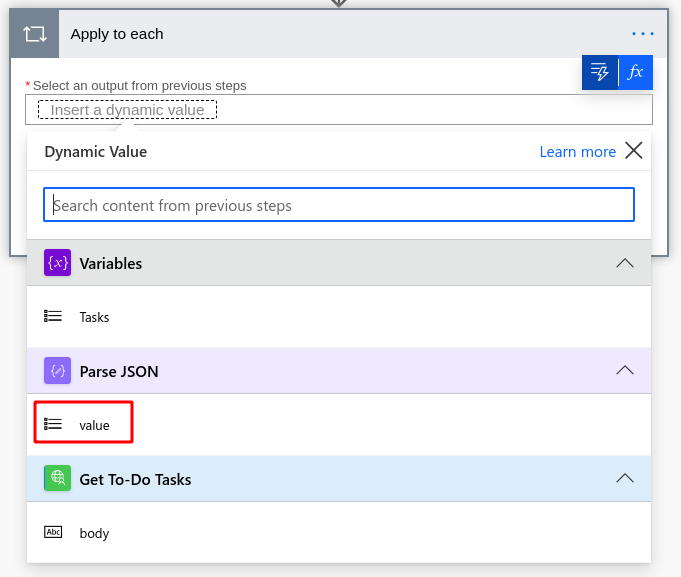
After creating the Tasks array, we need to populate it with the tasks. This is achieved by adding an Apply to each step. A Apply to each is a type of loop. In our case, it will loop through all the tasks in our body JSON we parsed earlier and pick out the values for each task. Start by adding an Apply to each loop and selecting value output from Parse JSON
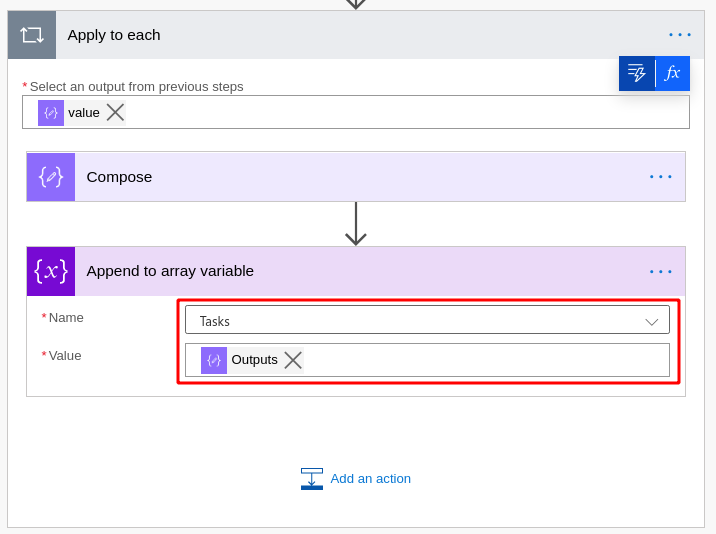
Next, within the Apply to each step, Add an action and choose Compose. This will take a specific value from the task. Under inputs, choose title under Parse JSON.

The next step we need to add in the loop is an Append to array variable. We will use this to add the task title to the Tasks array we created earlier. Set the Value to the Outputs of Compose.
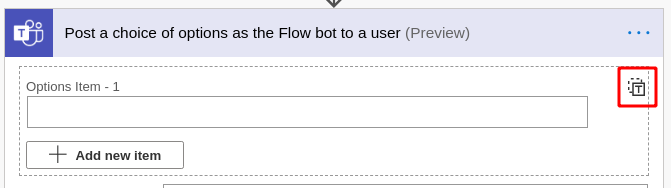
Now we should have a list of tasks ready to use. The next step is to send these to us in Teams. To do this, we need to add Post a choice of options as the Flow bot to a user, making sure this is added after the Apply to each and not inside it.
Before entering any details, change the options type to an array by clicking the T icon.
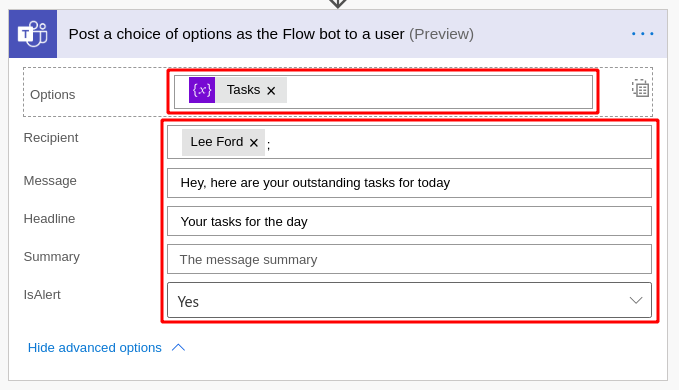
Now, add the following:
- Options:
Tasksvariable - Recipient: The same account you signed in to the Flow with
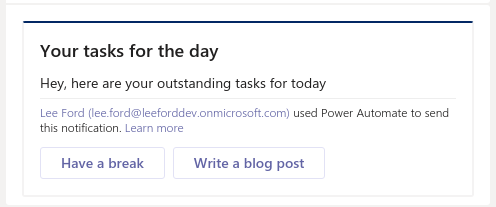
- Message: Something like
Hey, here are your outstanding tasks for today - Headline: Something like
Your tasks for the day - IsAlert:
Yes- This makes it so you are notified of the message in Teams
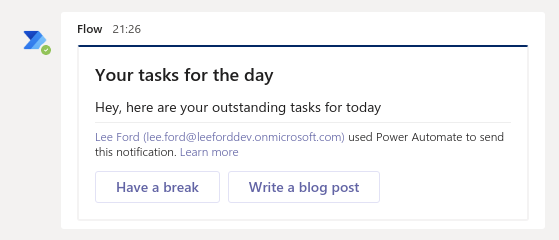
If you were to run the Flow now, you will see the list of tasks appear in Teams. However, choosing any of the tasks doesn’t do anything.
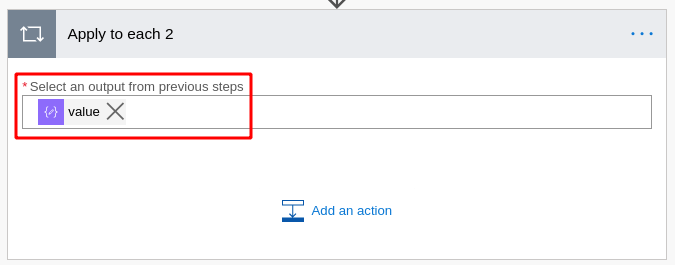
Back in the Flow, we need to fix it so when an option (task) is chosen, we do something with it. Add another Apply to each and like the previous loop, select value output from Parse JSON.
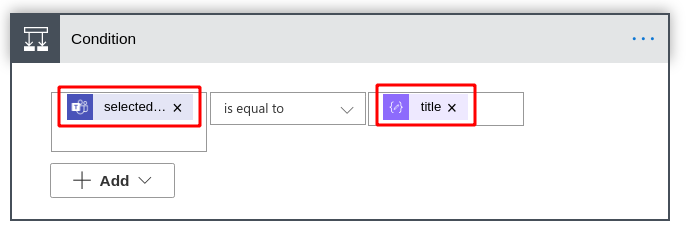
Within this Apply to each step, Add an action and choose Condition. A Condition is a way to verifying a value is what we want/don’t want. In our scenario, we are looping through tasks and looking for the one that matches what the user selected in Teams. To do this set the first value as selectedOption under Post a choice… and the second value is title under Parse JSON.
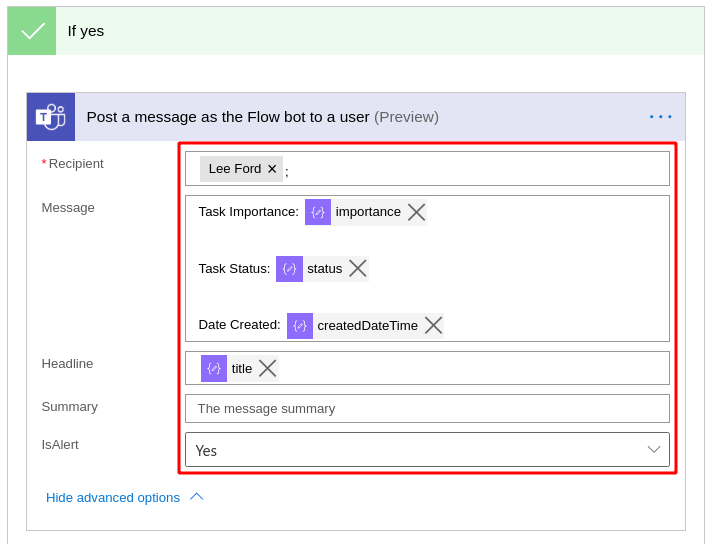
We now need to act upon when the condition is met (the task equals the chosen option in Teams). Under If yes, add Post message as the Flow bot to a user. Complete it as follows:
- Recipient: The same account you signed in to the Flow with
- Message: A message containing the details of the task (see image)
- Headline:
Titlefrom Parse JSON - IsAlert:
Yes- This makes it so you are notified of the message in Teams
Leave If no blank.
Finishing up
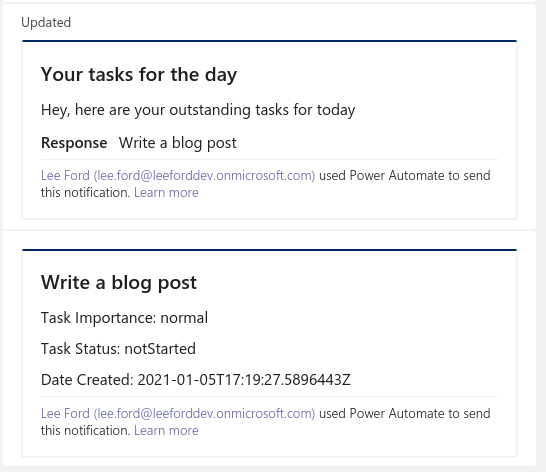
If you now run the Flow it should send you a message with your tasks.
Choosing a task will then return details on that task.
Congratulations, you have now managed create an Azure AD application, talk to Microsoft Graph, pass that in to Power Automate and on to Teams!