Introduction
Recently, I wanted to use the Microsoft Graph JavaScript SDK within my Node app. If you are familiar with the SDK, you will know that it will not obtain its own access token - you need to use an authentication provider and feed that to the SDK client.
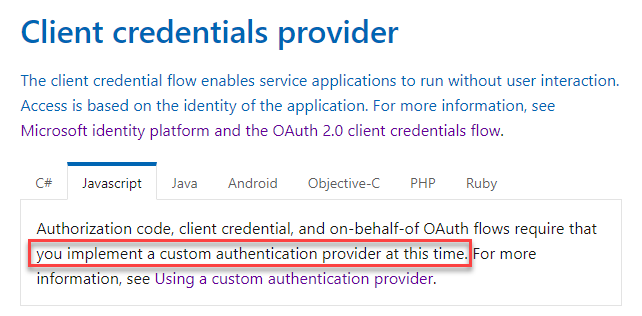
Typically, with browser-based authentication you would authenticate as the user and use something like the implicit grant method with a library such as MSAL. However, for server-side applications (with no user interaction) you will want to use application permissions and the client credentials method/flow. When using application permissions, you will need to use a Tenant ID, App ID and Secret of your Azure AD Application. In addition, you will need Graph permissions granted to the application. The Graph docs example for the this method when using the Graph SDK states you need to create your own authentication provider:
So, let’s do that… The full (language agnostic) flow is documented here. I’m focussing on using the JavaScript/TypeScript SDK
Step 1 - Create Azure AD Application
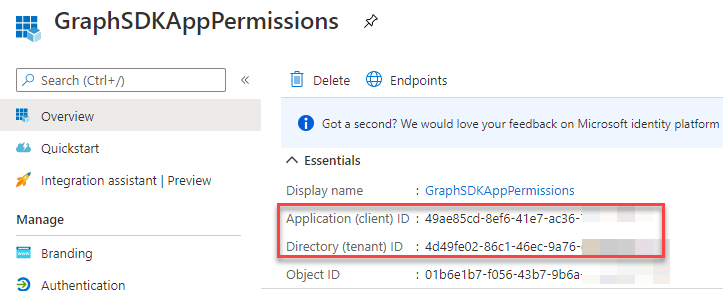
The first part is to configure your Azure AD application and obtain the following:
- Client/Application ID
- Directory/Tenant ID
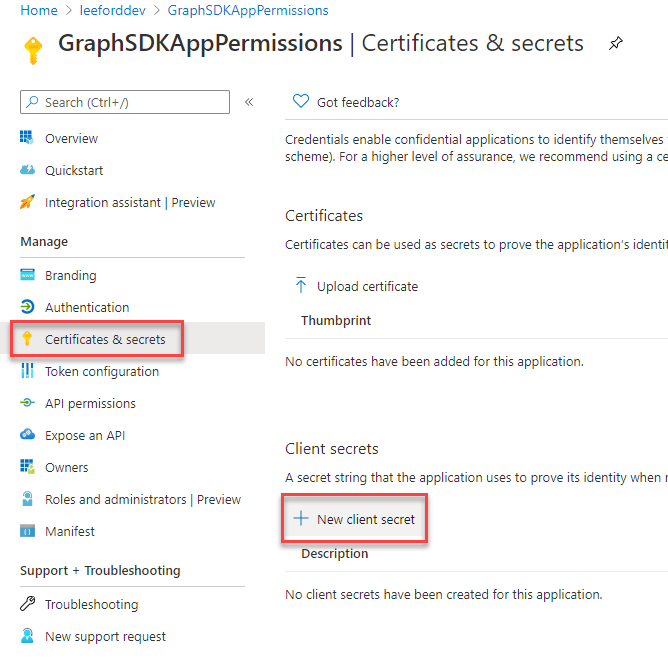
- Client Secret (make a copy of this and keep it somewhere safe)
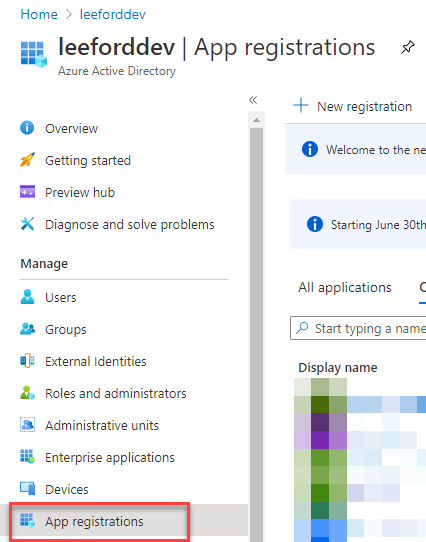
Login to Azure Portal at https://portal.azure.com
Go to Azure Active Directory and select App registrations:
Select New registration and give your app a Name and choose what account types can access it. Then, select Register:

Copy the Application (client) ID and Directory (tenant) ID for later:
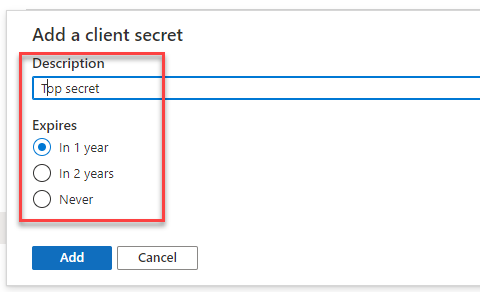
Next, go to Certificates and secrets and create a New client secret. Make sure you copy it before the next step:

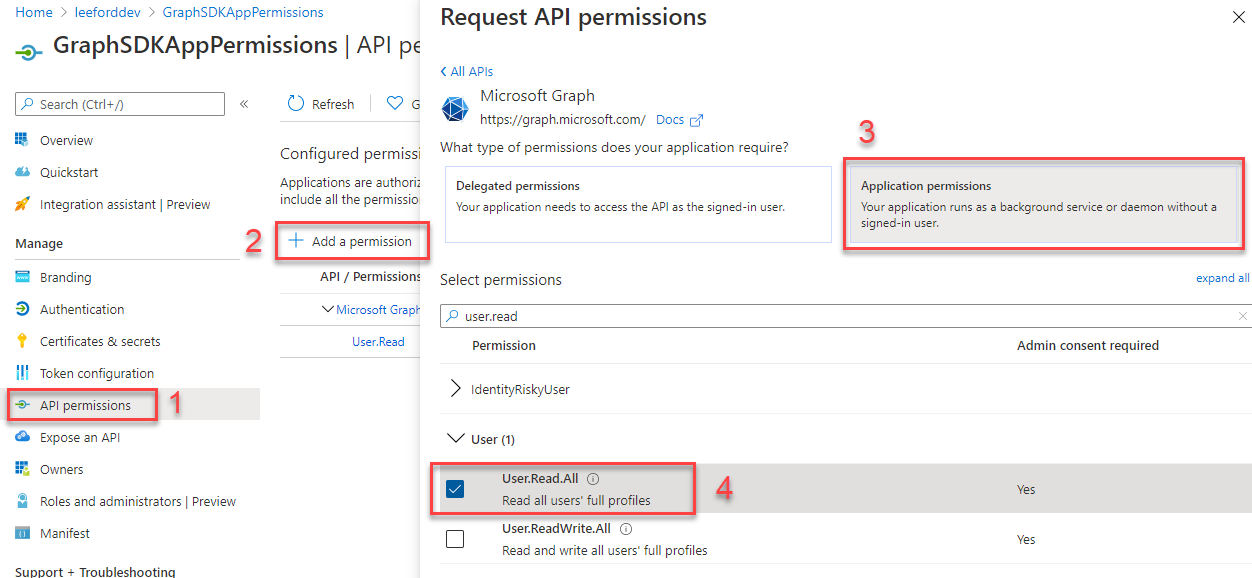
Now, go to API permissions and select Add a permission. Select Microsoft Graph and Application Permissions. Select the relevant permissions for your app:
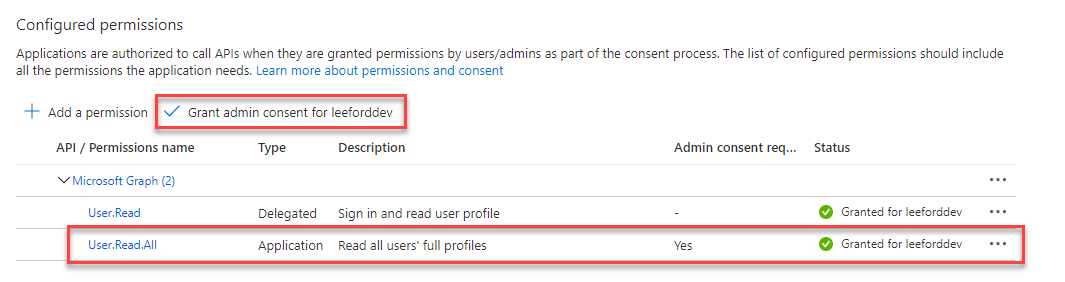
Once the permissions are added, you will need to Grant admin consent as there is no user interaction with application permissions:
Your Azure AD Application should now be setup for Graph application permissions.
Step 2 - Create an Authentication Provider
The first part of the solution is creating the authentication provider. This is done by creating your own class and implementing the AuthenticationProvider class from the Graph SDK. I’ve used environmental variables that map to the Azure AD app that was created earlier. A simple HTTP request will give us the access token with the assigned Graph permissions.
Step 3 - Use Authentication Provider with the Graph SDK client
I’ve then created a Graph SDK client and specified the authProvider as the one I created (this is where you could use other providers such as MSAL). In addition there is a sample Graph call to get users, making use of the client.
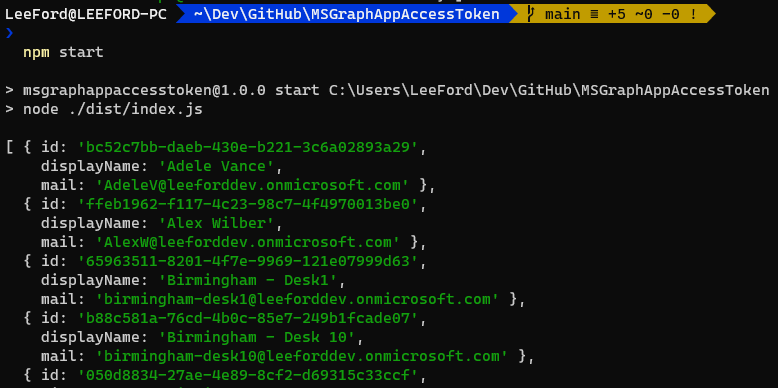
Step 4 - Success
Running the script now returns my users…
Hopefully you found this helpful and you’ve been able to call Graph using application permissions. I’ve provided a working sample (with instructions) on GitHub