I’ve previously blogged about the Office 365 Service Communications API before and how it can be used to obtain the service status/health of services in your Office 365 tenant. The API also allows you to get historical status along with messages (from message centre, incidents etc.).
In my previous post I showed how this could be done in Flow using a standard HTTP call within each Flow. It works, but it also means you need to set up authentication and each API call manually (even if in the same Flow).
This Flow custom connector allows you to connect to the Office 365 Service Communications API and query the following from the API:
- Get Services: Get the list of subscribed services
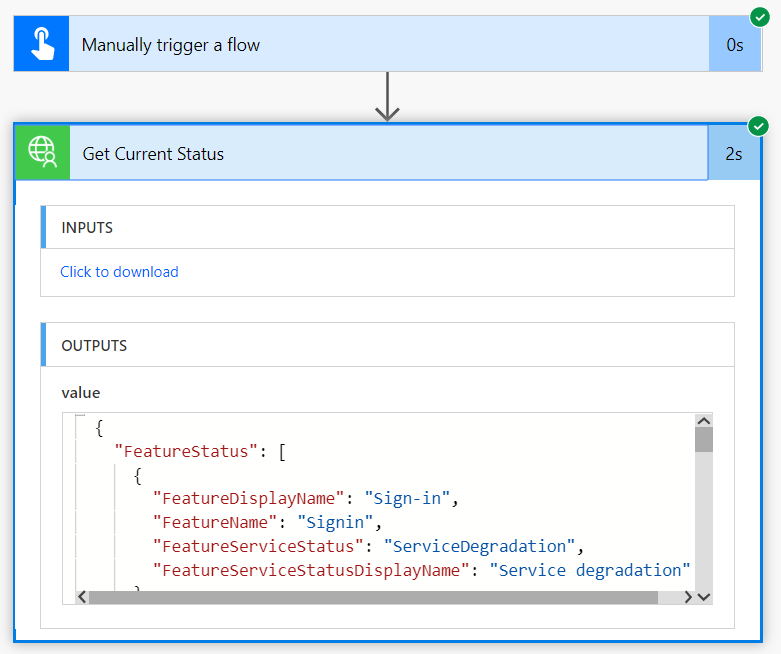
- Get Current Status: Get current service status including any incidents
- Get Historical Status: Get historic service status including any incidents
- Get Messages: Get Incidents, Planned Maintenance, and Message Centre communications.
As it’s a connector for Flow you only need to configure authentication in a single place and actions can be reused multiple times across Flows.
Set Up
Before you can use the connector, you will need to create an Azure AD application and assign permissions to be able to read the Office 365 service.
Create Azure AD application
- Login to Azure at https://portal.azure.com
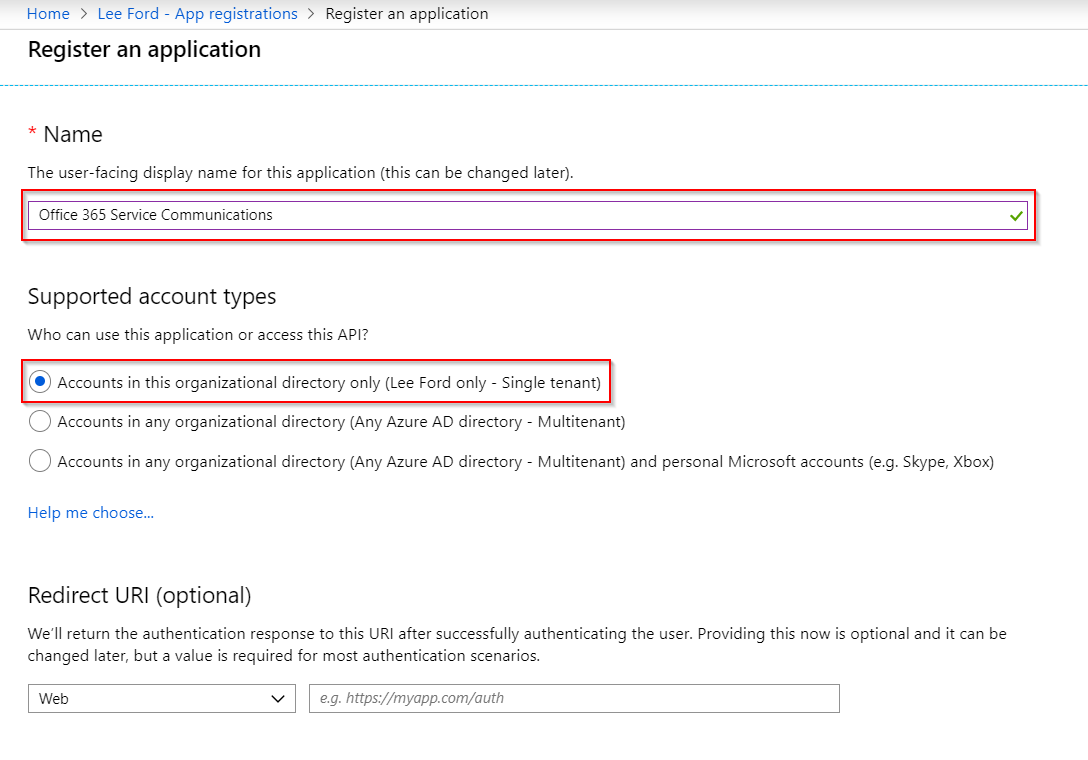
- Under Azure Active Directory, go to App registrations and select New registration
- Give the application a name and set as Single Tenant and select Register
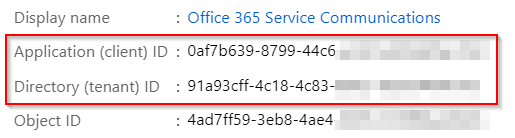
- Make a note of the Application (Client) ID for the Flow connector
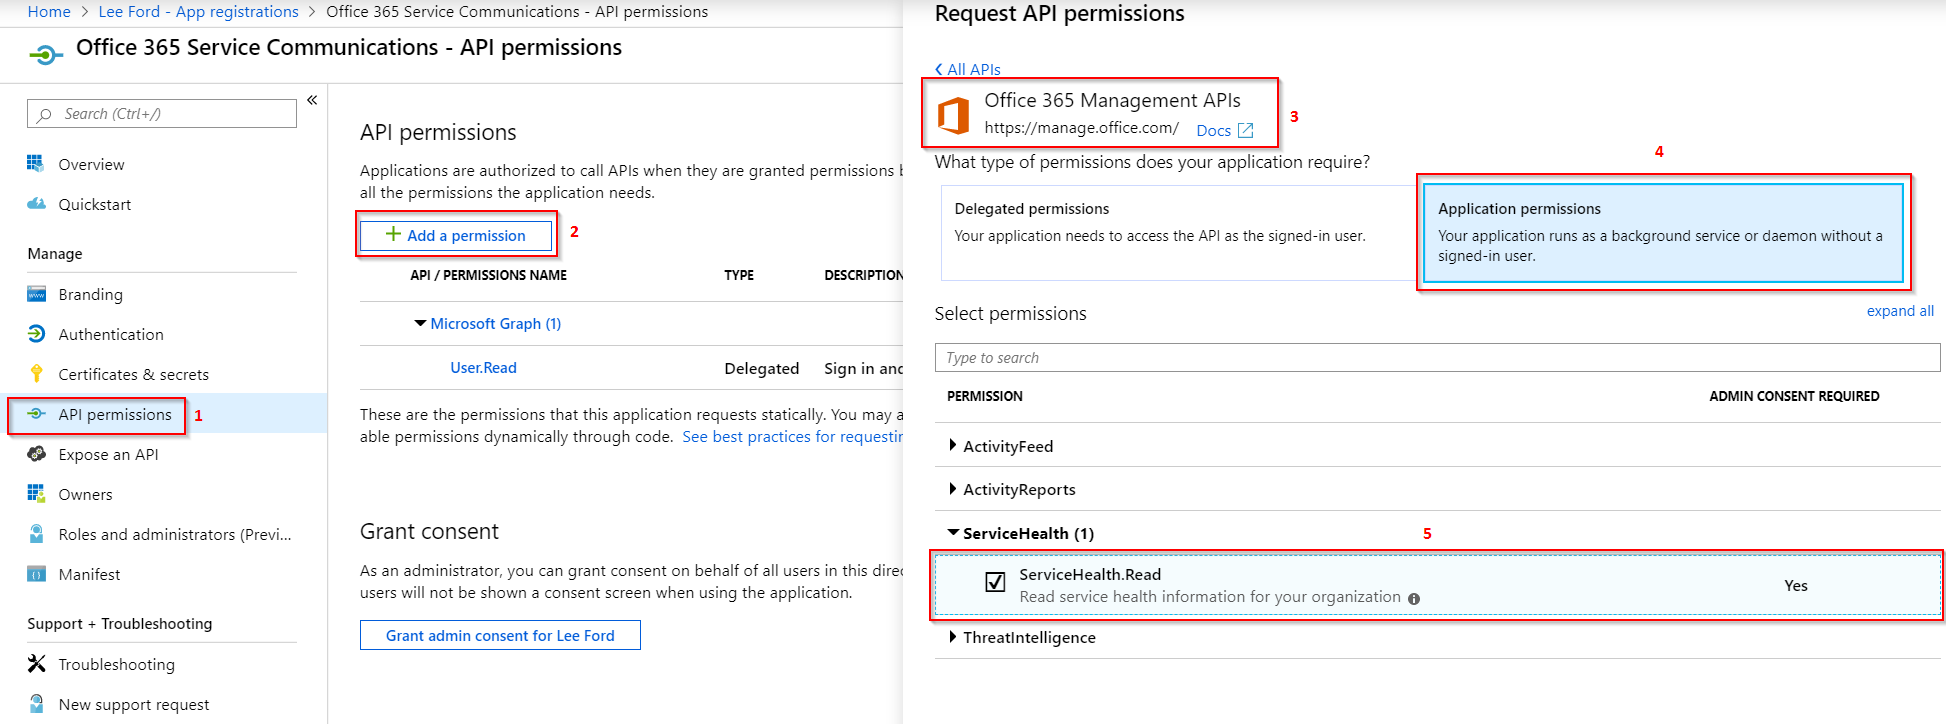
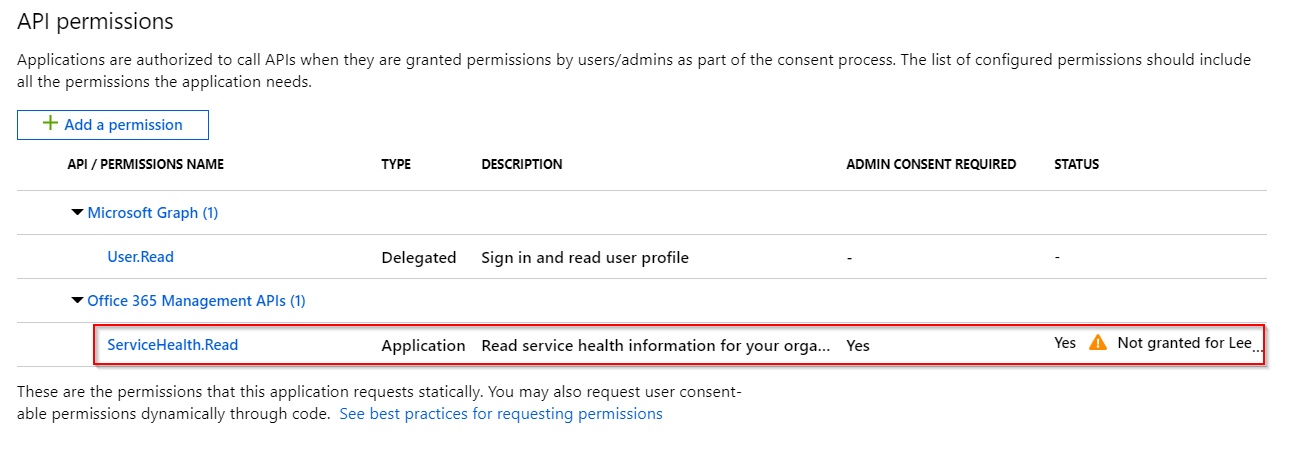
- Under API Permissions, assign the ServiceHealth.Read Application permission under Office 365 Management APIs
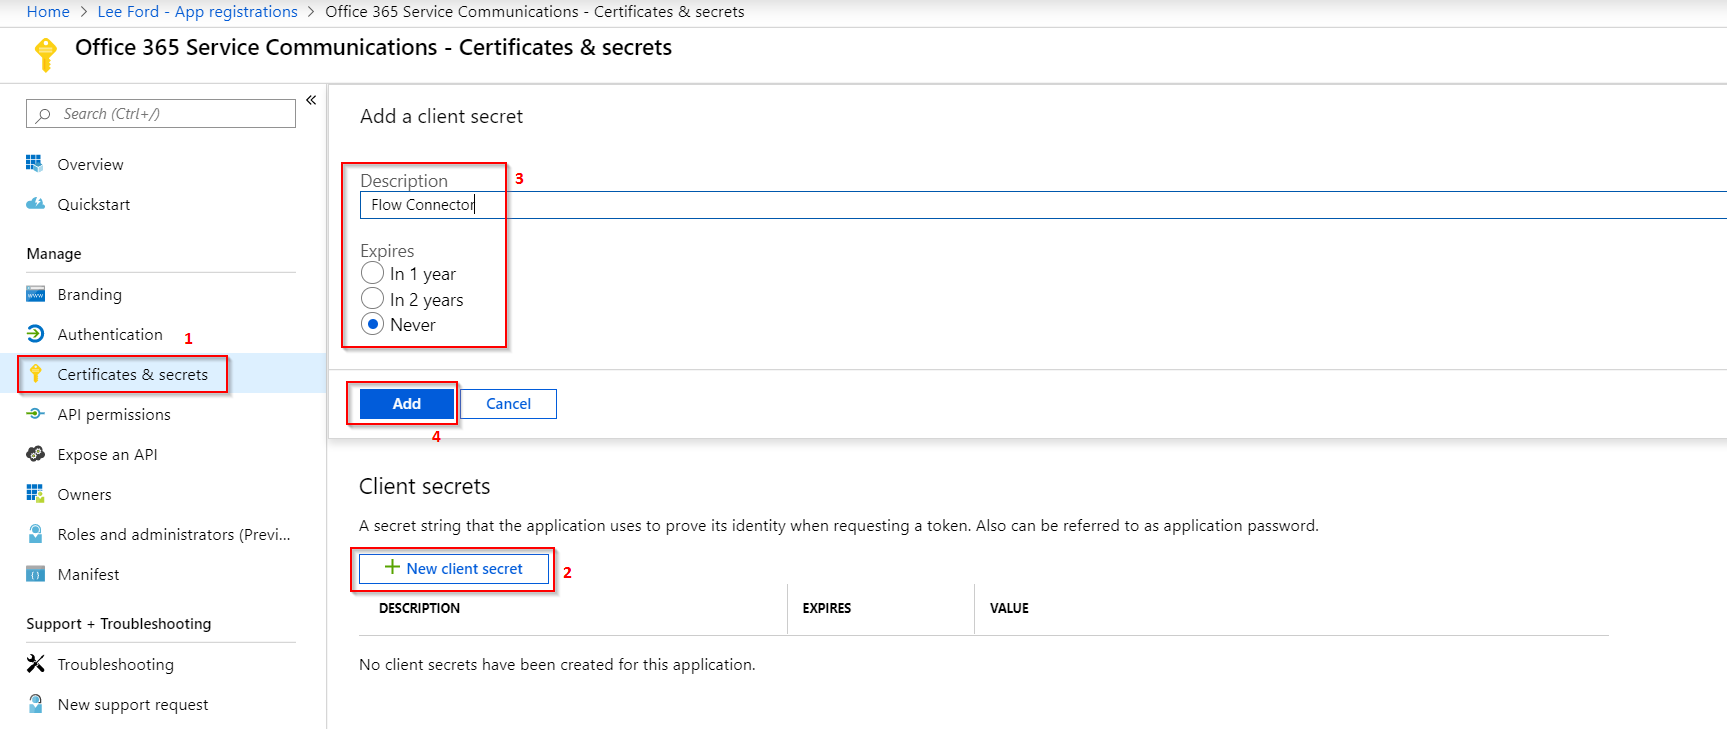
- Under Certificates and secrets, create a New client secret. Once created make a note of the Client secret for the Flow connector

- Leave the page open as you will need one further change after importing the connector
Importing Flow Connector
- Either clone download the connector .json file from here
- Login to https://flow.microsoft.com
- Under Data, select Custom connector
- Select New custom connector and Import an OpenAPI file

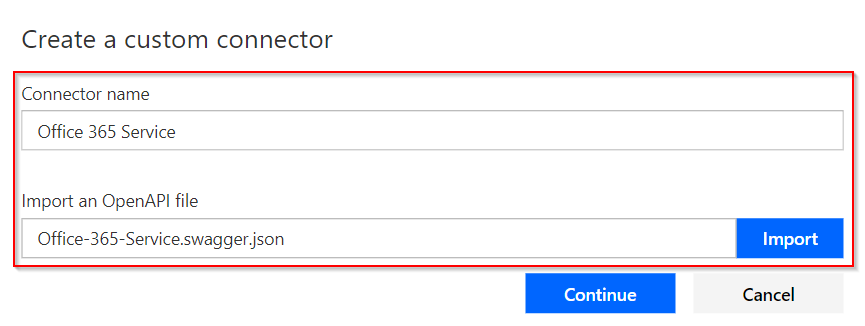
- Give the connector a name e.g. Office 365 Service and select the .json file
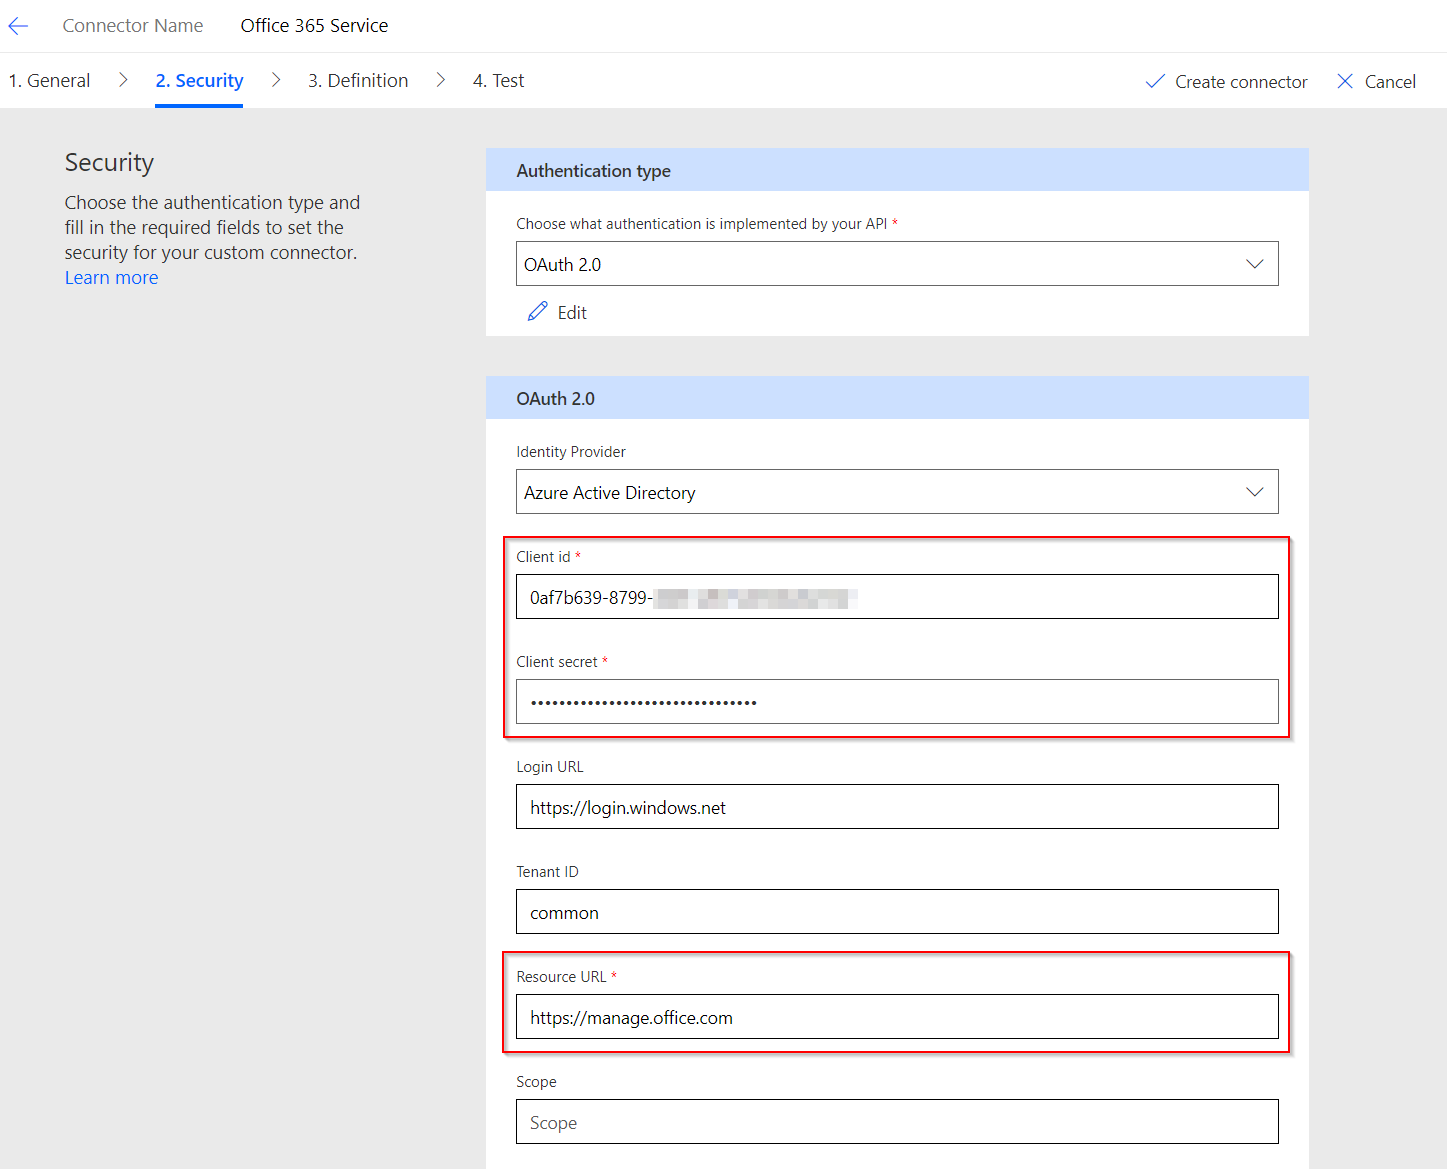
- Under Security, enter the Application (Client) ID and Client secret you took note of earlier. Set the Resource URL to https://manage.office.com and select Create connector
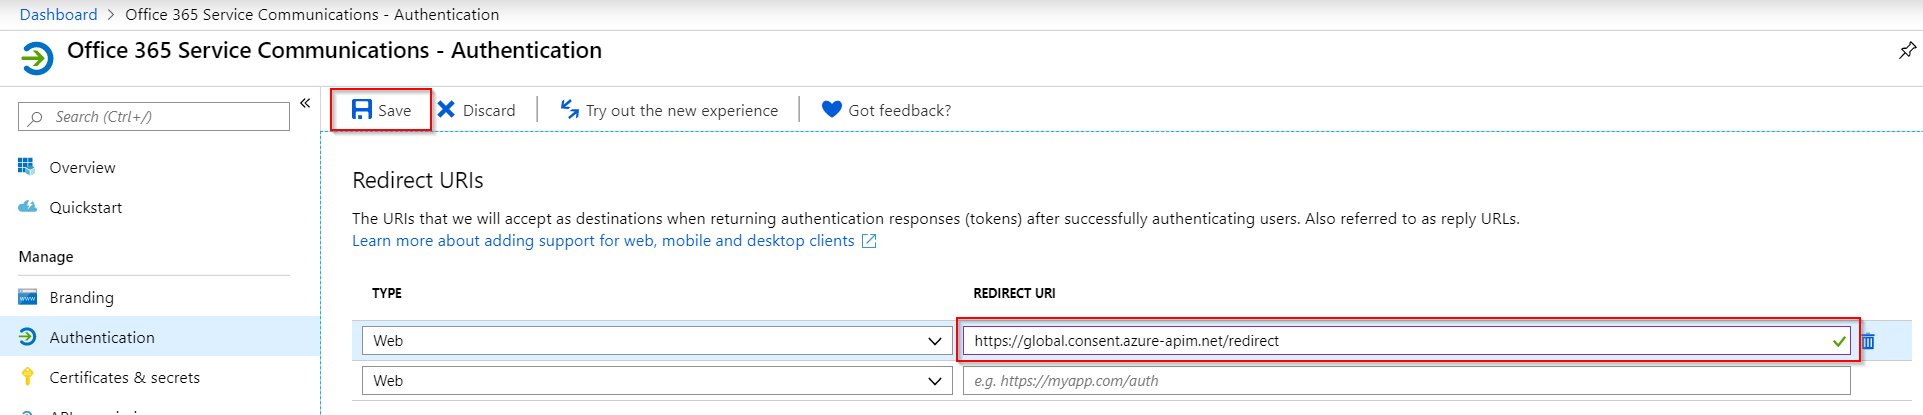
- The Redirect URL should now be populated in the Security section. Copy this

- Go back the Azure AD application and select Redirect URI. Add the copied URL and put this as a Web URI

Using the Flow Connector
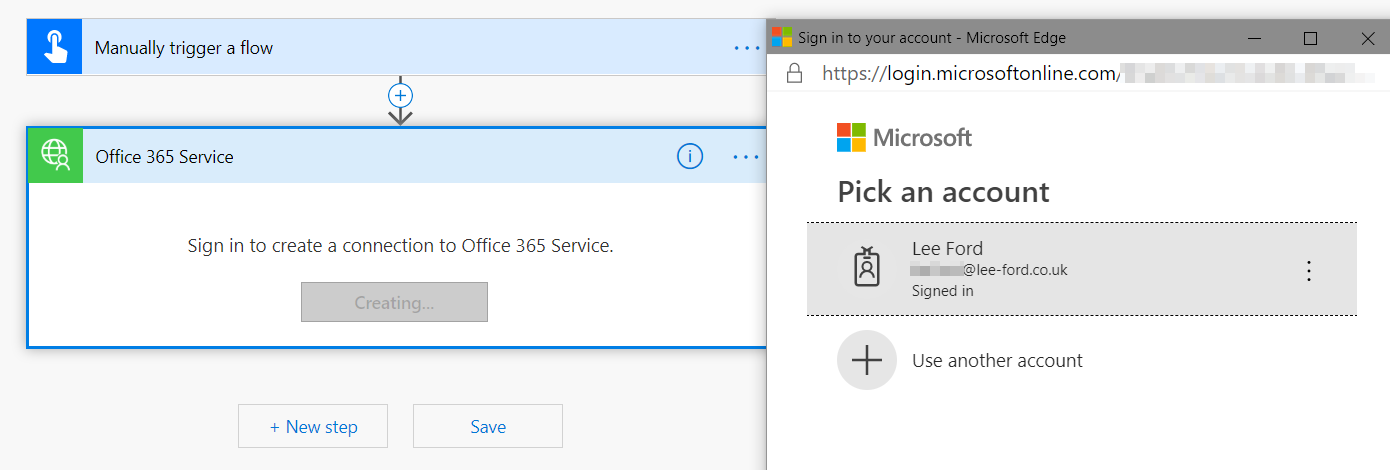
- Create a Flow and actions should be found under the Custom connector type
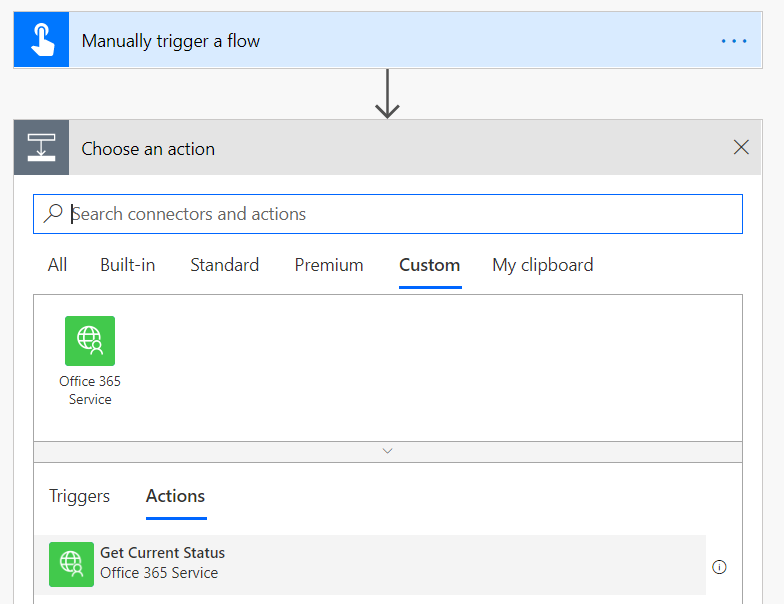
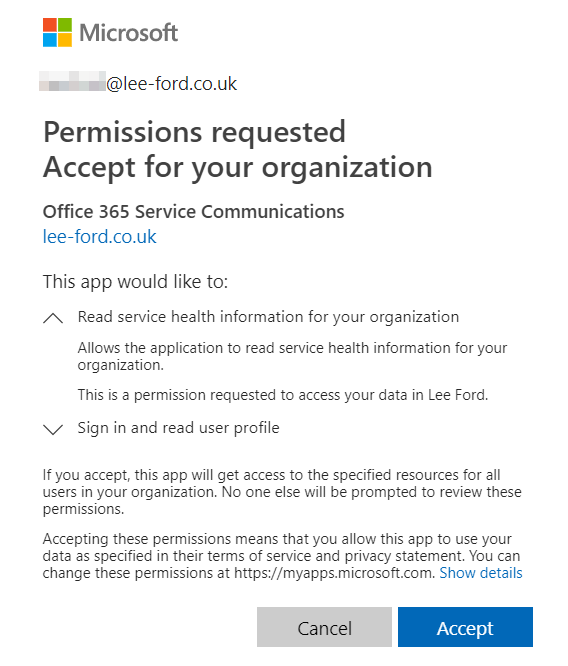
- When you select an action for the first time, you will be prompted to sign in with as a user to authenticate against the Azure AD application
- The connector should now work as intended