This is a quick post to outline the steps to integrate Microsoft Graph API using Microsoft Flow or Azure Logic Apps. The intent is to be able to integrate Graph API without user input. I intend to follow this post with other posts outlining use-cases for this.
Before you start, you need to make sure you have the following:
- Access to an Office 365 tenant with administrative access to Azure AD
- Access to create flows in Microsoft Flow
Step 1 - Create an Application in Azure AD
You will need to register an application within Azure AD. This can effectively provide access to Azure AD by methods other than a user account.
Navigate to Azure Active Directory from https://portal.azure.com and select App registrations. Select New registration.

Give the application a name, supported account type (in my case, I only want accounts in my organisation) and leave the Redirect URI blank.

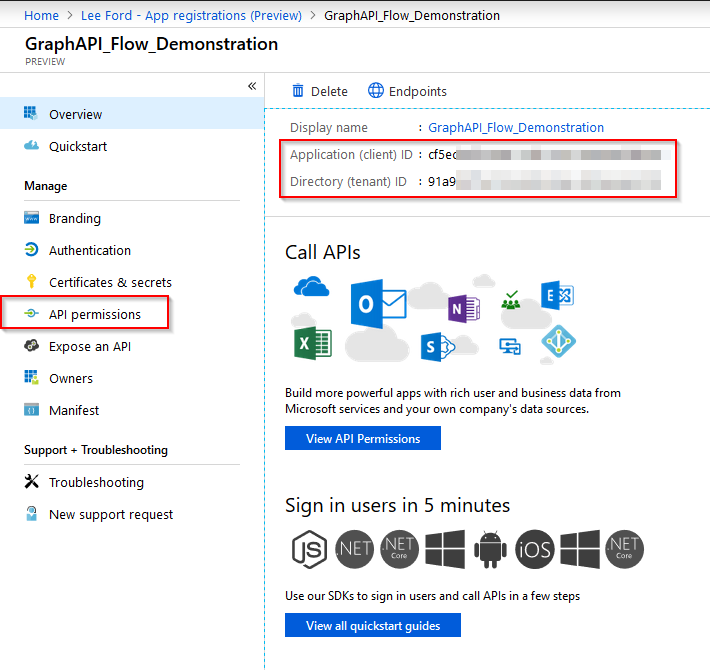
With the application now created - make a note of the Application and Directory IDs (you will need these later in Flow) Next, you need to grant the application some permissions. To do this select the application and then select API Permissions.
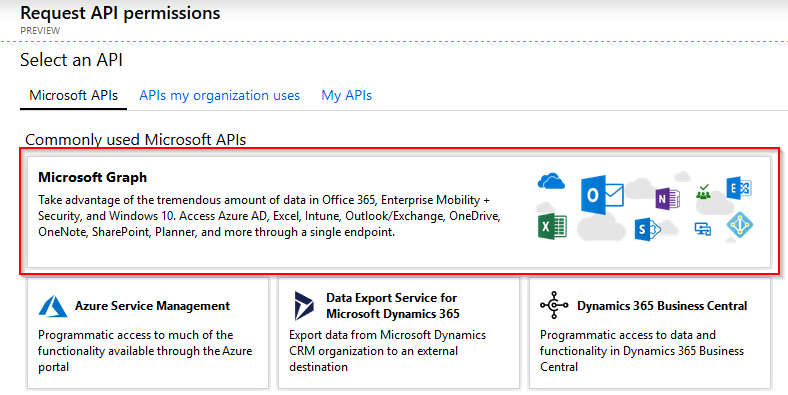
Select Graph API.
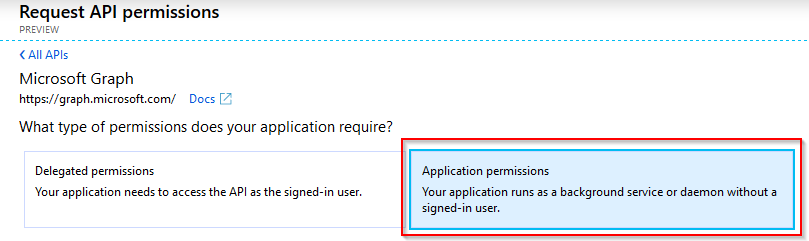
Select Application permissions.
Grant the required permissions you need. For reference, use the Graph API documentation and under each API call, there are the permissions required for that call. In this case, I’m using User.Read.All and selecting Add permissions.
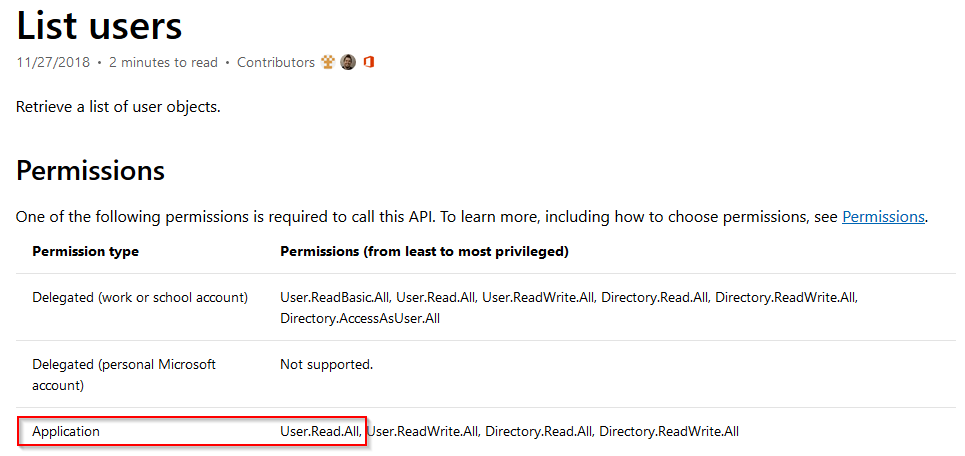 Required Application permission by Graph API
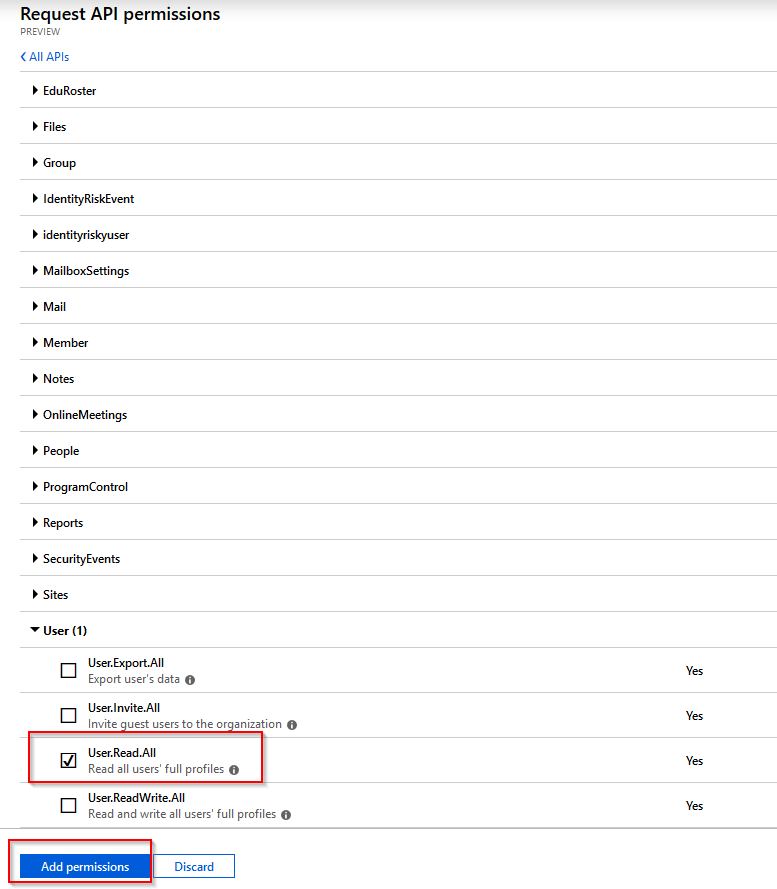
Granting required permissions to the application
With the permissions created, you need to grant consent to the application. Effectively, you are allowing the application to access Graph API without a consent screen - which is key when using in Flow as there will be no user interaction.

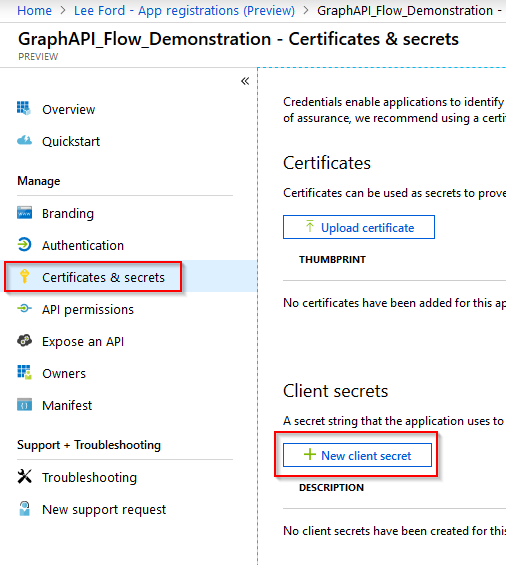
The next step is to create a secret for the application to use. By using a secret, you can effectively use the application without any user credentials being used - perfect for something scripted like Flow. The fact it’s called a secret should be enough warning to make sure you keep this safe!
Staying within the application, select Certificates and secrets. Select New client secret.
Give the secret a description and select an expiry time of the secret. As this is a demonstration, I will choose 1 year.
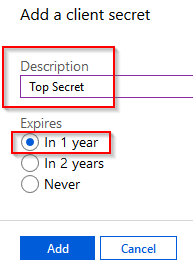
Make a note of the secret somewhere safe along with the Application and Directory IDs.

Step 2 - Create a Flow
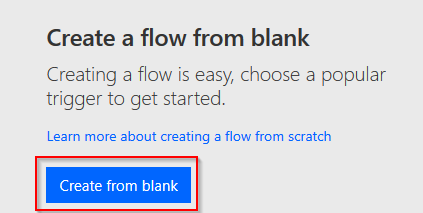
With the Azure AD application created, you can now look to create a flow using it. First, go to https://flow.microsoft.com and go to My flows. Select New > Create from blank to create a new flow.
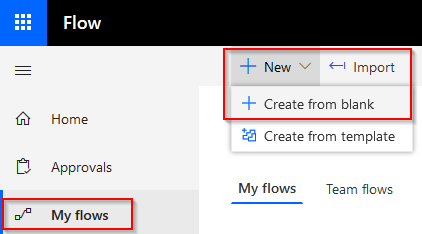
Don’t use any triggers and select Create from blank
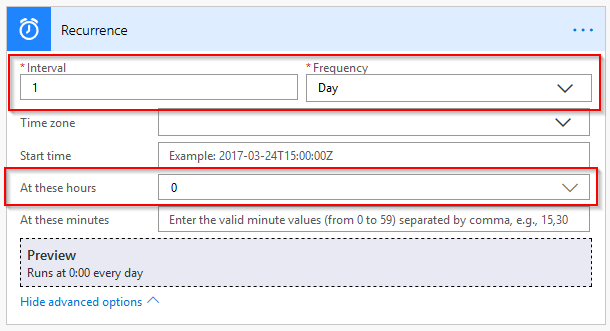
Select a trigger to start the flow. In my case I will use a Recurrence (once a day at midnight)
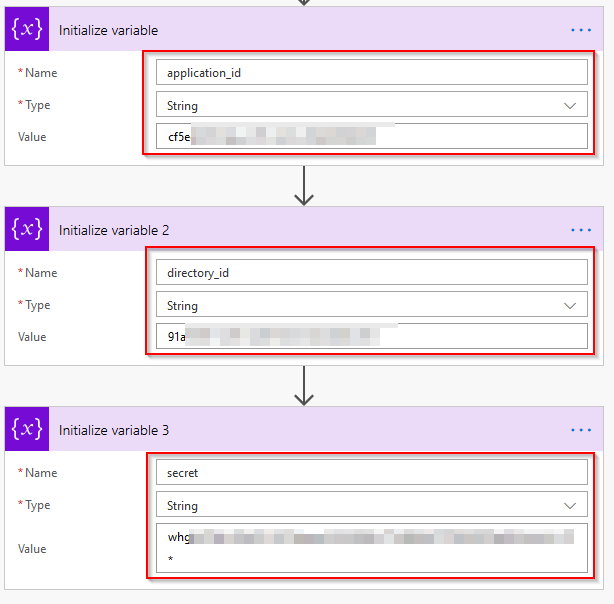
The next step in the flow is to create some variables. These variables are the application (client) id, directory (tenant) id and secret you should have from the previous steps. Create 3 variables like below.
With the variables defined, they can be used to create the API call to Graph. To do this, create a HTTP action with the following information:
- Method to GET
- URI to Graph API Call In my example, I’m using https://graph.microsoft.com/v1.0/users
- Authentication to Active Directory OAuth
- Authority to https://login.microsoft.com
- Tenant to the directory_id variable you just created
- Audience to https://graph.microsoft.com
- Client ID to the** application_id variable** you just created
- Credential Type to Secret
- Secret to the secret variable you just created

Save the flow and give it a name.
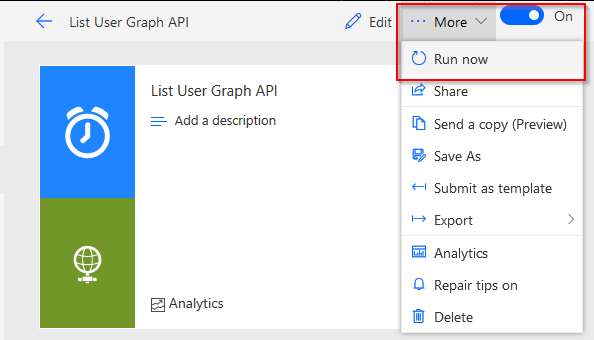
Step 3 - Run the Flow
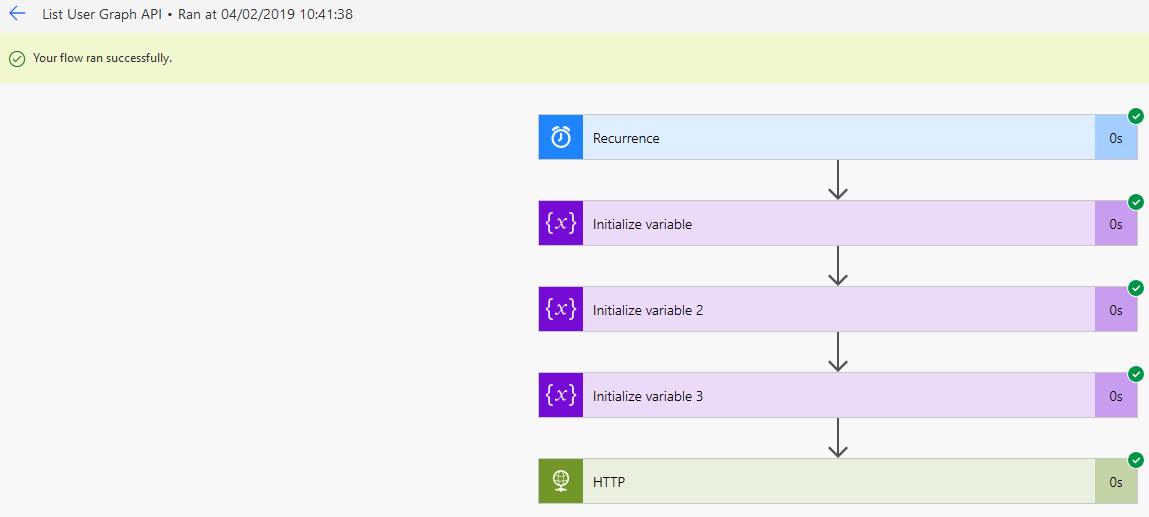
Under Flow I can now choose the run the flow.
All being well, the flow should run successfully and not produce any errors.
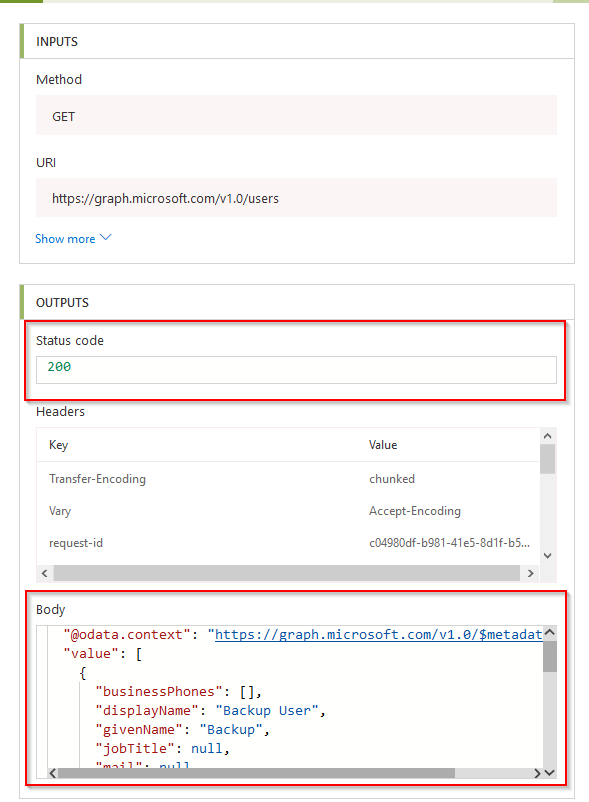
Drilling down into the HTTP Graph API call, I can see the status code 200 (OK) and the data itself in the body.
Next Steps
This post has outlined how to create an Azure AD application and use it with Flow/Logic Apps. You should be able to take this and implement it into other Graph API calls, this could be to create or modify existing data, not just retrieve data.