MSGraphAPIGUI - A PS GUI for Microsoft Graph API
Note: This script is provided ‘as-is’ without any warranty or support. Use of this script is at your own risk and I accept no responisiblity for any damage caused.
Background
Graph is Microsoft’s API for Microsoft 365. By creating an Azure AD application it allows you to interface directly with Azure AD, Office 365, EMS etc using Graph API.
You may want to write a script in PowerShell, Python, C# etc. to use with Graph API - or maybe you want to use Flow.
Sometimes it’s easier to use a GUI for your needs (especially for testing scripts) - for delegated (user) permissions in Graph API you can use the excellent Graph Explorer. However, I wanted to be able to use a GUI for application permissions (e.g. run without user sign-in). I tried using tools such as Postman but it was too much hassle dealing with access tokens, so the selfish need for a script began!
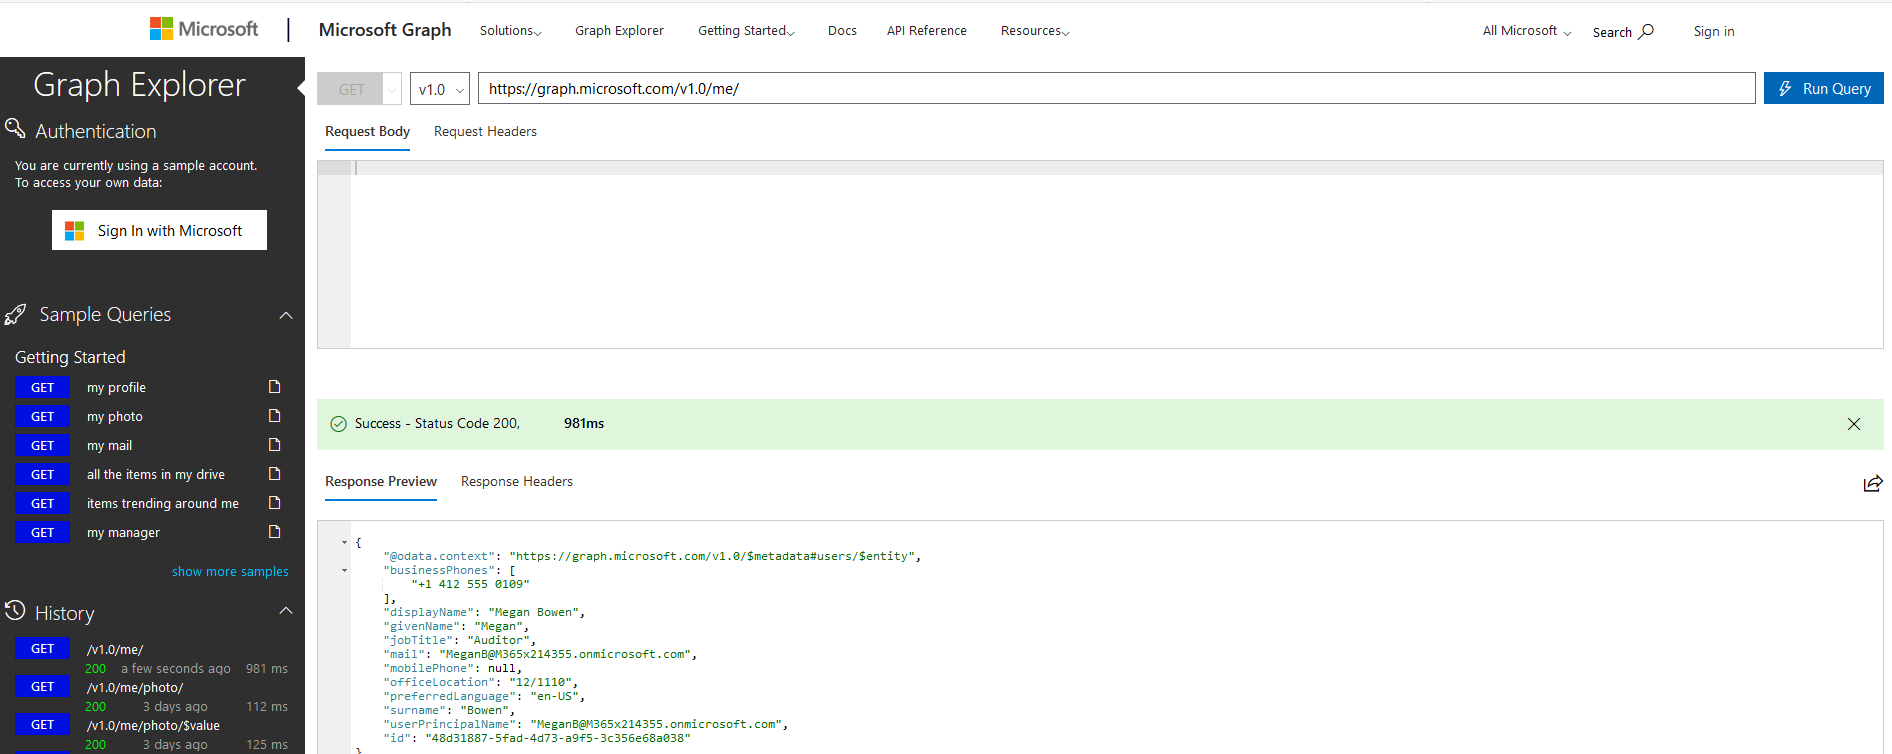 Graph Explorer
Introducing MSGraphAPIGUI
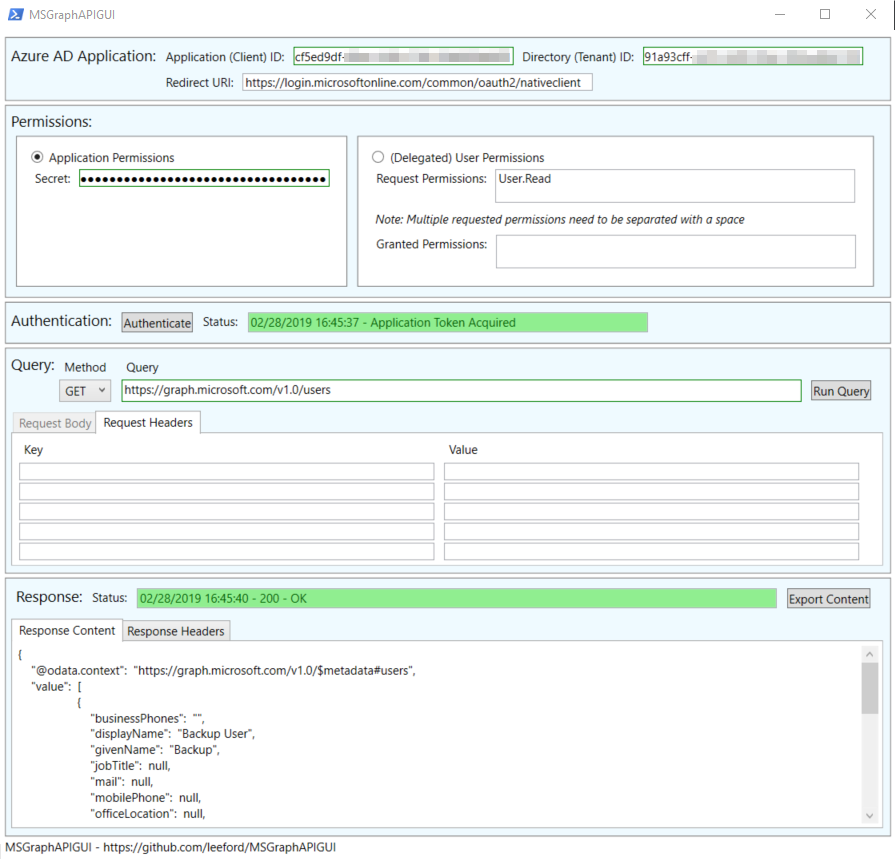 Yeah… I’m not a UX designer!
I’ve created a PowerShell GUI script for working with Graph API. High-level features include:
- Support of Azure AD applications v1 and v2
- Support of Azure AD delegated (user) permissions
- The script prompts to sign in as a user to authenticate
- Request permissions * Support for Azure AD application permissions
- Run Graph API as an application (no user login required)
- Support for any Redirect URI
- Run a Graph API query with:
- Method
- URL
- Body
- Request Headers
- Export response content to a file
Prerequisites
This script relies on WPF for it GUI elements so I’m afraid PowerShell Core is not currently supported.
Before you can use the script with Graph API, you need to ensure you have an Azure AD application to use with Graph API. If you already have one setup as you need, the next part can be ignored.
Create an Azure AD Application
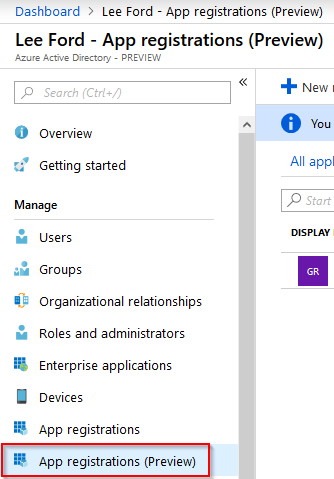
To create an Azure AD application login to https://portal.azure.com and navigate to Azure Active Directory. From here, select App registrations.
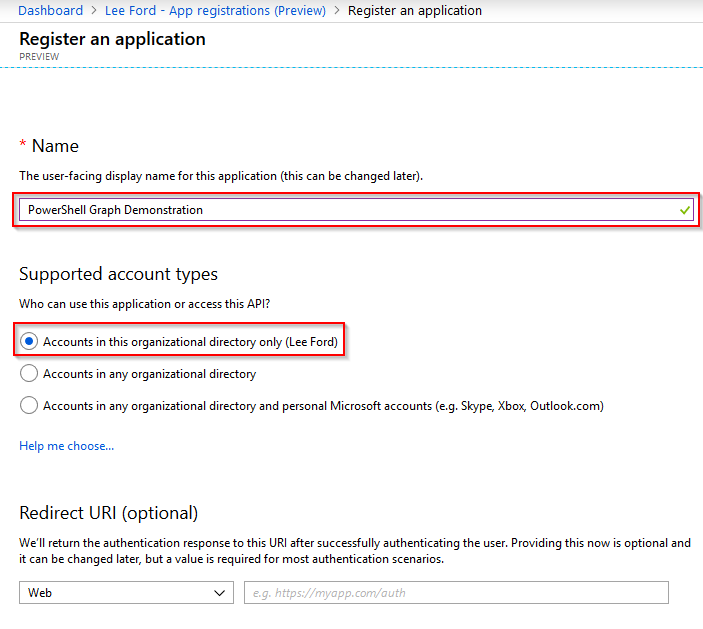
Select New registration and give your application a Name and Supported account type. Leave Redirect URI blank (for now) and select Register.
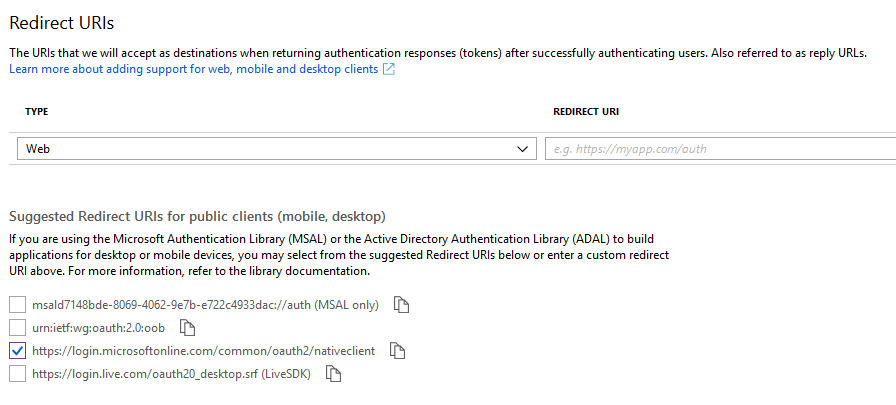
The application will now get created. Make a note of the Application (client) ID and Directory (tenant) ID as these will be needed for the script. Next, you need to specify a Redirect URI to use for the acript. Select Add a Redirect URI from the application page.

The script is set to use https://login.microsoftonline.com/common/oauth2/nativeclient as the Redirect URI, but any can be used. Whatever you use, it will need to be put in the script.
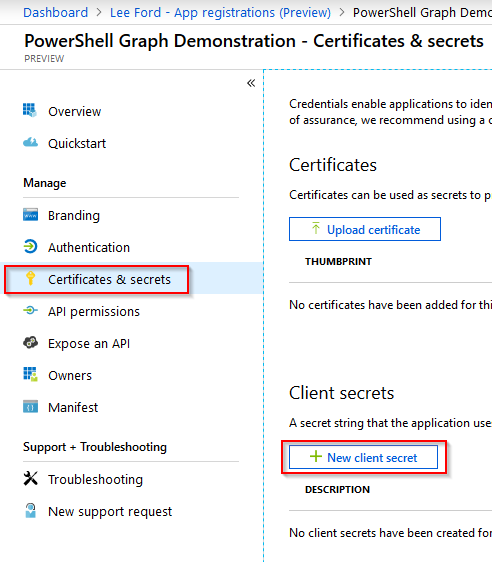
If you intend to use application permissions, create an application secret . From within the application page, select Certificates and secrets and select New client secret.
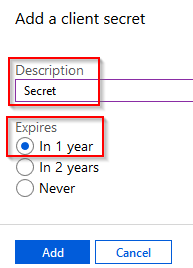
Give the secret a **Description **and set an **Expiry **on the secret.
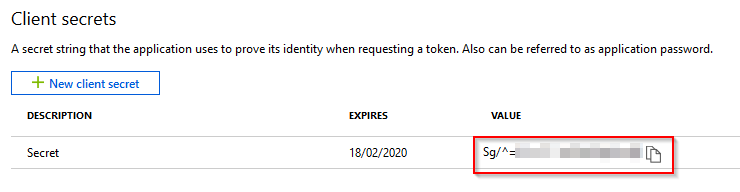
IMPORTANT: Copy the secret and put it somewhere secure, as once you click away, it will be hashed out and you’ll need new one.
This application will now need permissions assigned to it.
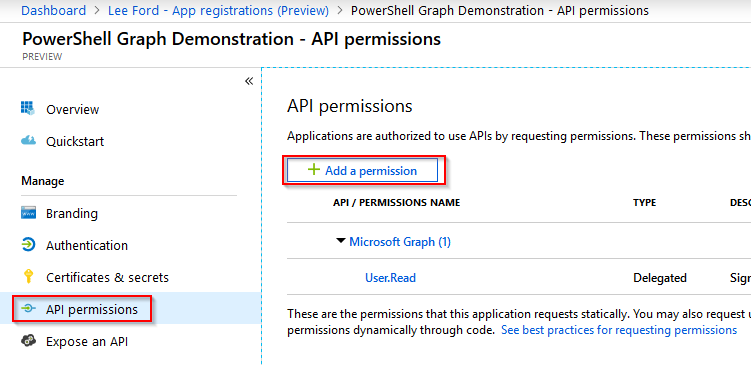
Under the application, select API permissions and then select Add a permission.
There are many types of permissions that can be assigned, if you are unsure what you require, I would recommend looking at the Graph reference - https://docs.microsoft.com/en-us/graph/api/overview?toc=./ref/toc.json&view=graph-rest-1.0. Each query will list the permissions required.

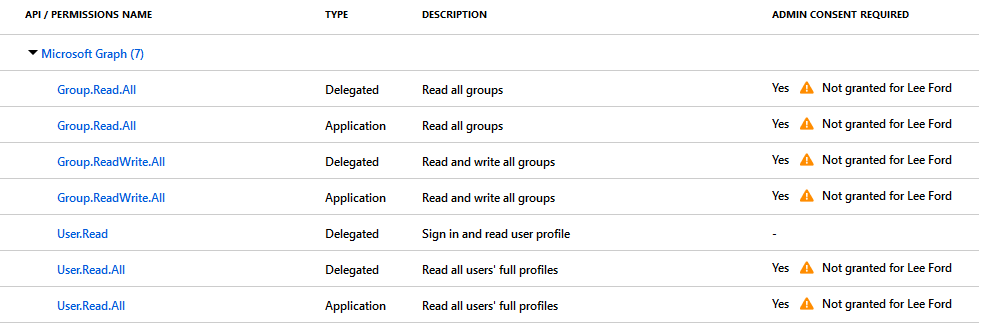
You may have noticed these permissions have not been consented by an Admin. Without consent by an Admin these permissions will not be granted and the Graph requests will fail. To grant consent there are two methods:
- Grant consent in the Azure AD application API permissions area - if you are using application permissions this is the only method. If permissions are granted for users using this method, all users are granted permissions!
- Have users ask for consent - if you are going to use delegated (user) permissions, if not already granted consent the signed-in user is prompted to ask for consent from an admin.
With permissions assigned you can now use this Azure AD application with the Graph API.
Using MSGraphAPIGUI
Firstly, grab the latest version of the script from Github - https://github.com/leeford/MSGraphAPIGUI
Ensure you have the MSGraphAPIGUI.ps1 and MainWindow.xaml in the same folder.
Run the script by typing the following in PowerShell:
.\MSGraphAPIGUI.ps1
The GUI should appear. The first step is to enter the application/client id and directory/tenant id of the Azure AD application.

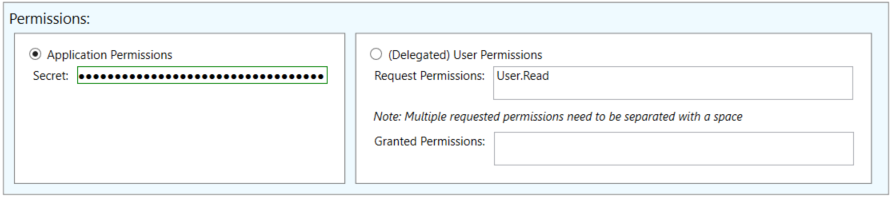
After that, select if you are using application or delegated (user) permissions. If you are using application permissions, specify the secret of the Azure AD application. If using delegated permissions you do not need to enter any additional permissions unless you wish to ask for them to be granted consent.
With the permissions specified, click Authenticate to get an OAuth token. This is valid for 1 hour. After that time the script should automatically renew the token.

You can now query Graph API using the OAuth token. Enter the method, query URL and any request headers/body required.
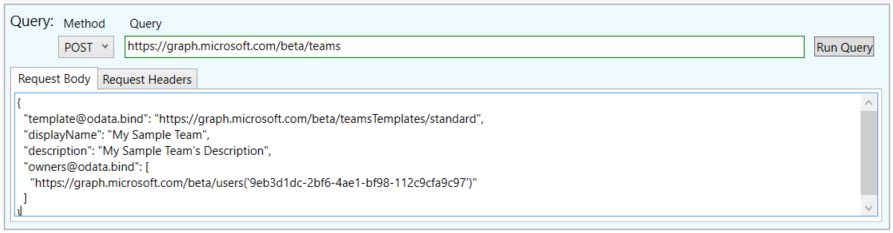
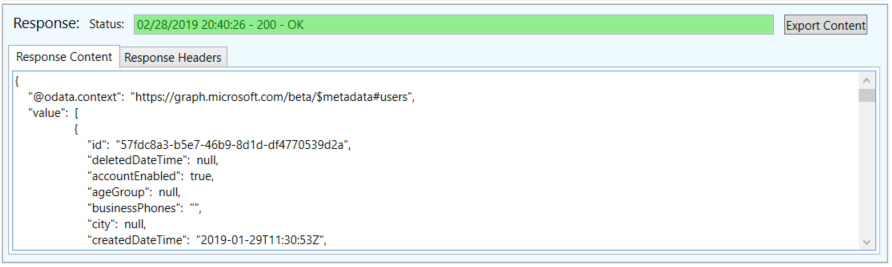
Below the query is the response. This will include the response code, content (usually in JSON) and the headers.
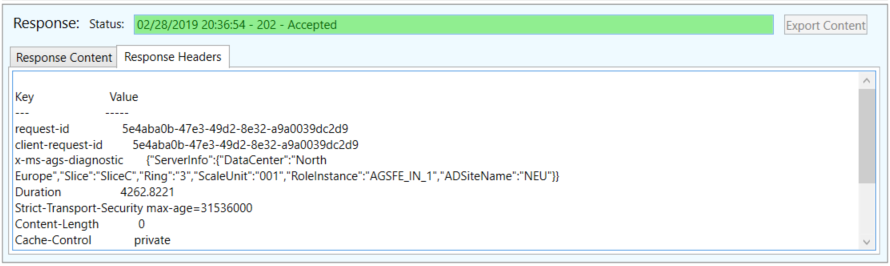
If there is content, you can export it and save it as a file.
Wrap Up
I hope you found this post and more importantly, the tool useful. This is my first GUI script and it probably shows! Any and all feedback welcome - raise an issue on the GitHub or if you know how to improve it, submit a pull request.